- Azure
- Azure DevOps
When you create a build inside Azure DevOps you always have a configuration to pass to generate your application package. This configuration can have variables like, environnement variables, folder path, logins, passwords…
By default all these configurations are directly defined inside your azure-pipeline.yml file. This latter will be saved inside your code source repository. This is a good thing to keep all your build configurations with your project but as you can imagine, passwords must not be saved in clear in your code repository for security reasons. This is where the variables come into play.
How to use variables?
You have multiples possibilities, you can use variables directly on your azure-pipeline.yml file like this:
variables:
  configuration: release
  platform: x64
Or you can use Variable groups like this:
variables:
    - group: your-variable-group
If you want to use both you need to declare it like this:
- group: your-variable-group
- name: configuration
  value: release
- name: platform
  value: x64
In this case you will have to use name/value tags for the variables that are not in a variable group.
Create a variable groups
Signing task
Let’s take an example with a signing task for Android:
- task: AndroidSigning@3
  inputs:
    apkFiles: '**/*.apk'
    apksign: true
    apksignerKeystoreFile: 'production.keystore'
    apksignerKeystorePassword: 'keystorepwd'
    apksignerKeystoreAlias: 'key0'
    apksignerKeyPassword: 'aliaspwd'
    apksignerArguments: --out $(outputDirectory)/app.release.apk
    zipalign: true
As you can see above, we have some values like:
- The alias password
- The keystore password
These values should not be directly readable inside the build definition. So let’s move it to a variable groups.
Setup variable groups
To setup it, go to Pipelines > Library > Variable groups and create a new Variable group.
First give it a name for example: android-build-variables. Keep in mind that this name will be used inside your azure-pipeline.yml so avoid using spaces it will be easier to use. Then add your variables with a name and the associated value.
Here what we have for our example:
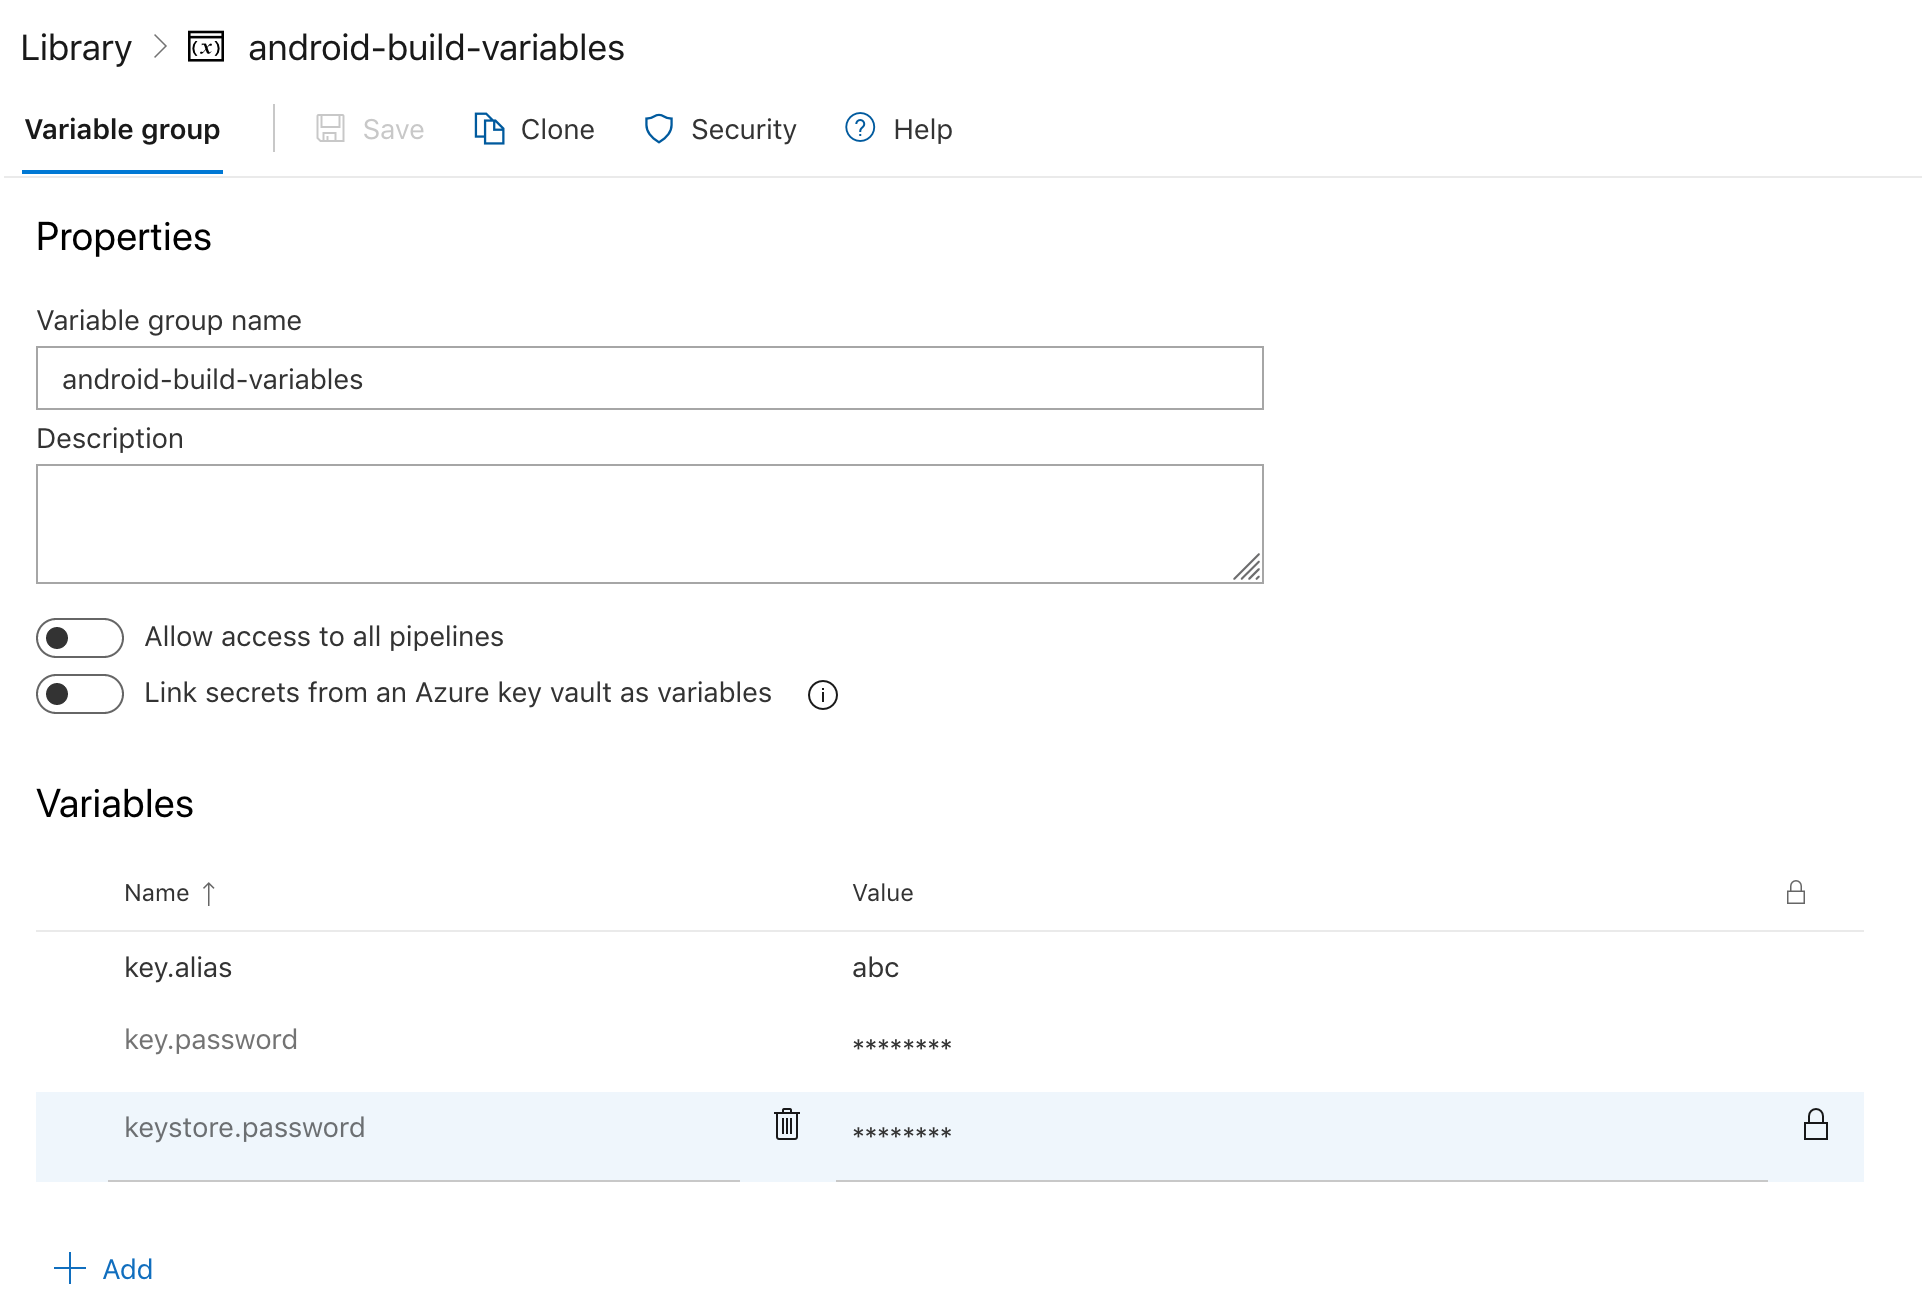
When you write a password you need to click on the padlock button to hide it to other users. Be careful, if you click again in this button the password value will be removed for security reasons, so you will need to rewrite it again, so no one can get the password.
Disable the option Allow access to all pipelines, the variable groups must be used just by your build.
Don’t forget to save it before going back to your build.
Load your variables group
Now let’s load the variables group before the steps tag and call each variables we just created using this syntax: $(my_variable_name).
Here is the updated example:
variables:
  - group: android-build-variables

steps:

#...

- task: AndroidSigning@3
  inputs:
    apkFiles: '**/*.apk'
    apksign: true
    apksignerKeystoreFile: 'production.keystore'
    apksignerKeystorePassword: $(keystore.password)
    apksignerKeystoreAlias: $(key.alias)
    apksignerKeyPassword: $(key.password)
    apksignerArguments: --out $(outputDirectory)/app.release.apk
    zipalign: true
When you will run your build for the first time, you will get an error like this:

This tell you that your build does not have access to your variable groups, just click the Authorize resources button and restart your build.
If you look at the build logs you will see that the passwords you passed are automatically replaced by ***.
Final touch
You can add as many variables you want in your variable groups even it’s not password, just keep in mind that writting azure-pipeline.yml file is like writting code, duplication is not a good thing, it’s better to use global variables if you can.
In the next tutorial you will see how to use variables and parameters inside your Azure DevOps pipelines.