- Azure
- Azure DevOps
When setting up continuous integration (CI) and continuous delivery (CD) you always need to manage different environments for your project.
Depending on your needs you will have at least 3 environments to drive your project correctly,for instance:
- Development
- Staging
- Production
The development (Dev) environment will be used only by the engineers team. This is the most unstable environment, it’s where everything is created. The Staging will be the mirror of the production environment, where the test team will check everything before pushing the code to production. Finally, the production environment is used for the final users. Of course everything must be as perfect as possible.
Of course, the name and the number of environments is always define by your team based on your needs.
Now, how to translate this needs into Azure Pipelines YAML?
The workflow
Let’s imaging this scenerio: you have to run a set of multiple unit tests and UI tests to validate that everything is done correctly. In parallel you build your application to be able to deploy it. If these two conditions are valid you can deploy on the Dev environment.
Let’s open Azure DevOps and translate this into YAML!
trigger: none

pool:
  vmImage: ubuntu-latest

stages:
- stage: Tests
  jobs:
  - job:
    displayName: Unit tests
    steps:
    - script: echo simulate running your unit tests!
      displayName: 'Run unit tests'
  - job:
    displayName: UI tests
    steps:
    - script:  echo simulate running your ui tests!
      displayName: 'Run unit tests'

- stage: Build
  dependsOn: [] # This will remove implicit dependency and run in parallel with the stage: Tests above
  jobs:
  - job:
    displayName: Build the application
    steps:
    - script: |
        echo Running all builds commands...
        echo ... commands successfully completed.
      displayName: 'Run build scripts & tasks'

- stage: Dev
  dependsOn:
  - Tests
  - Build
  jobs:
  - deployment:
    displayName: Dev deploy
    environment: Dev
    strategy:
     runOnce:
       deploy:
         steps:
           - script: echo Running in the Dev environment as deployment job
             displayName: 'Dev based stage'
As you can see above the Tests stage and the Build stage are done in parallel. The Dev stage will be launched if they both succeeded. The development environment is declared using the environment key word:
environment: Dev
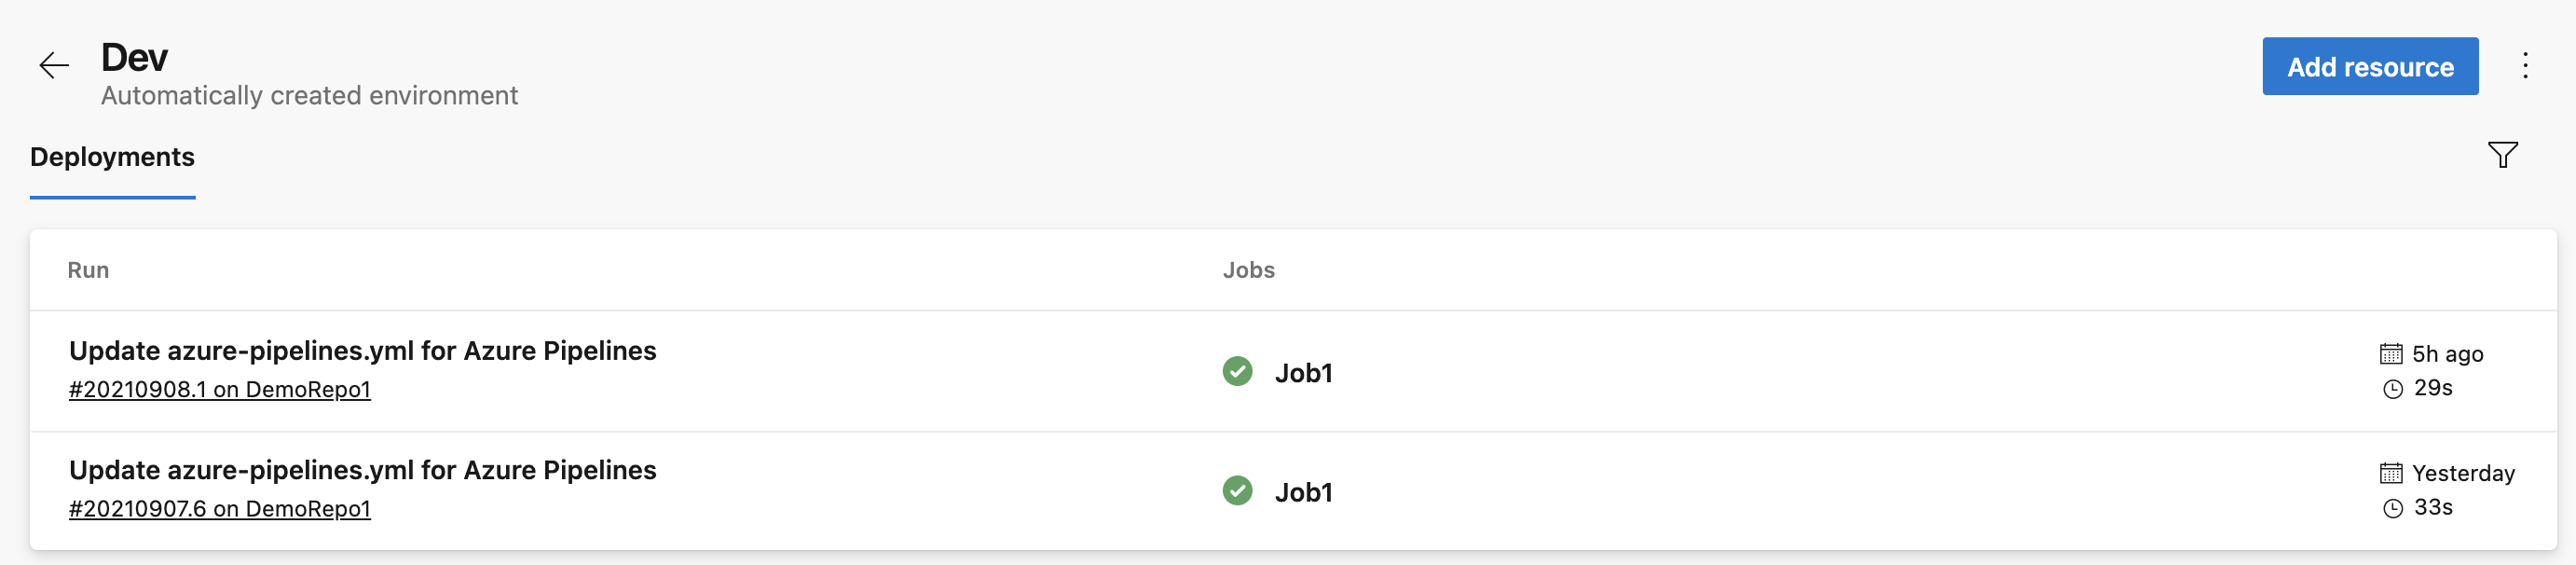
If you run this pipeline you will see inside Pipelines > Environments the Dev environment will automatically appear:

With that, you will be able to follow all the deployments done in this environment by just clicking on it:
Add other environments
With our development environment ready we can add now two stages that will represent the Staging and the Production environment using the same process:
- stage: Staging
  jobs:
  - deployment:
    displayName: Staging deploy
    environment: Staging
    strategy:
     runOnce:
       deploy:
         steps:
           - script: echo Running in the Staging environment as deployment job
             displayName: 'Staging based stage'

- stage: Production
  jobs:
  - deployment:
    displayName: Production deploy
    environment: Production
    strategy:
     runOnce:
       deploy:
         steps:
           - script: echo Running in the Production environment as deployment job
             displayName: 'Production based stage'
Now if you run the pipeline you will see something like this:
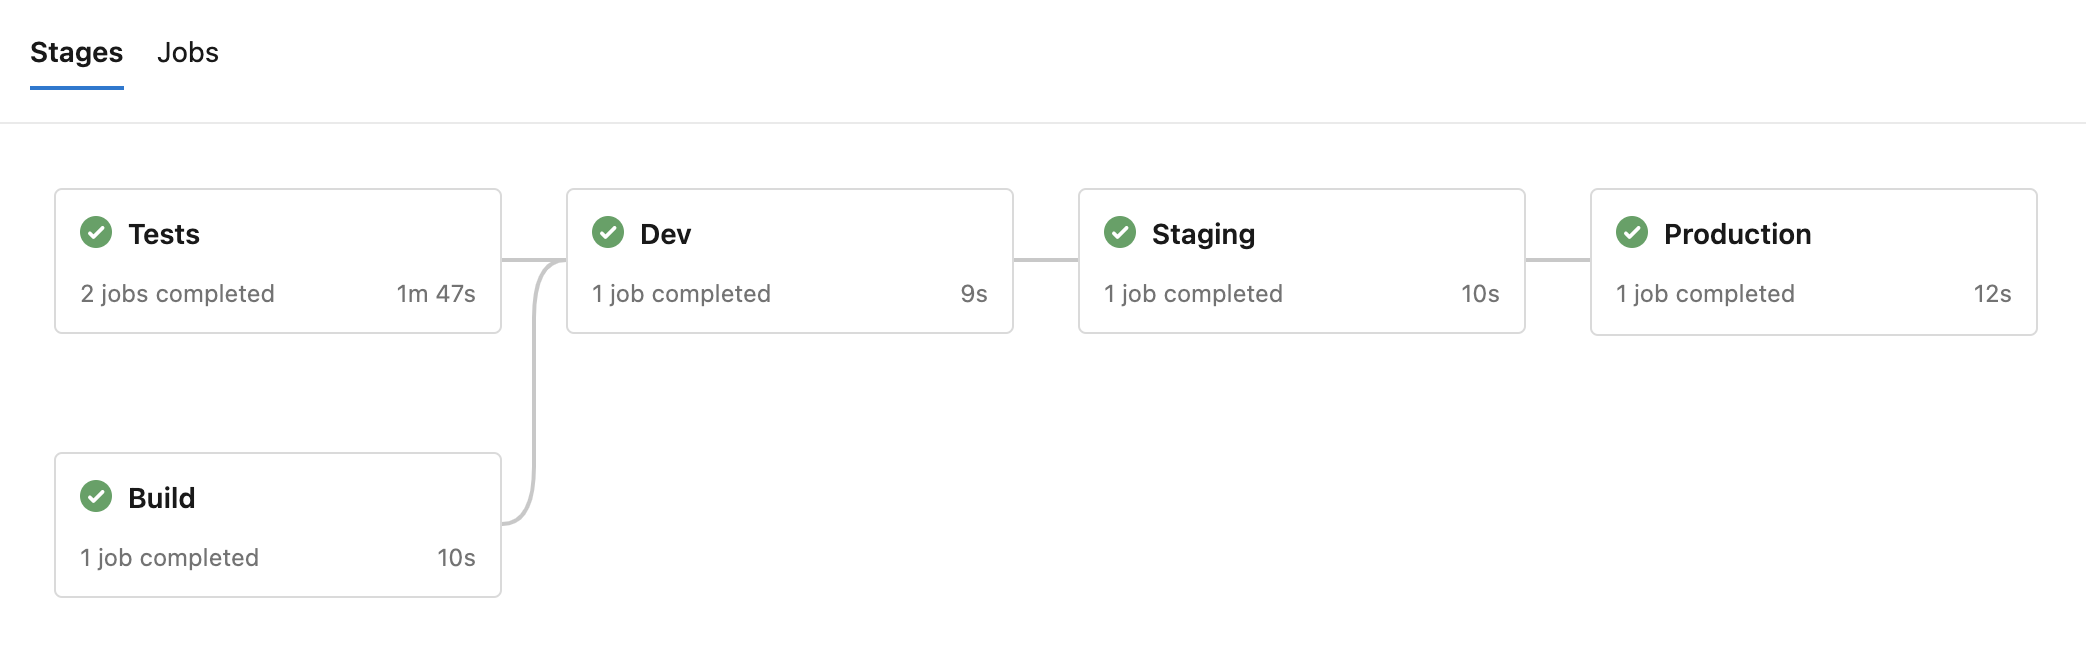
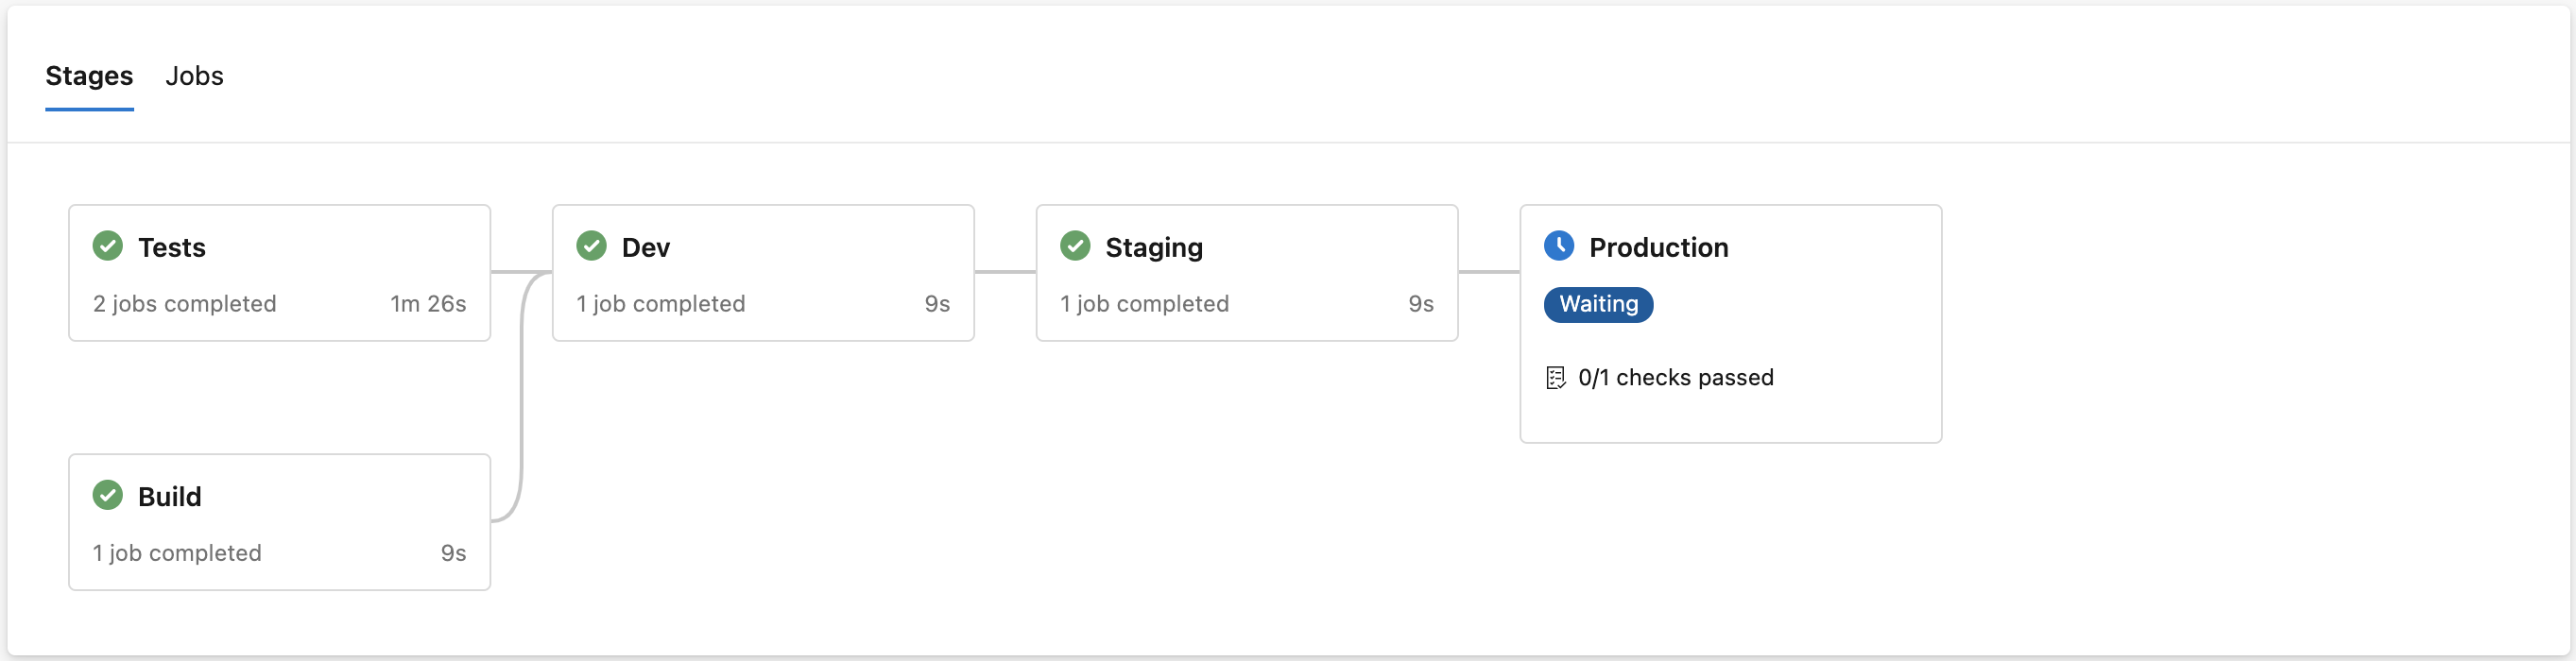
Now we have our environments ready to go but as you probably already noticed, when we run the pipeline all the environments are deployed once, which is not exactly what we want. Remember, we need to allow time to the test team to validate all the new developments on the Staging environment before pushing it to the production one.
So how to do that?
Configure your environments
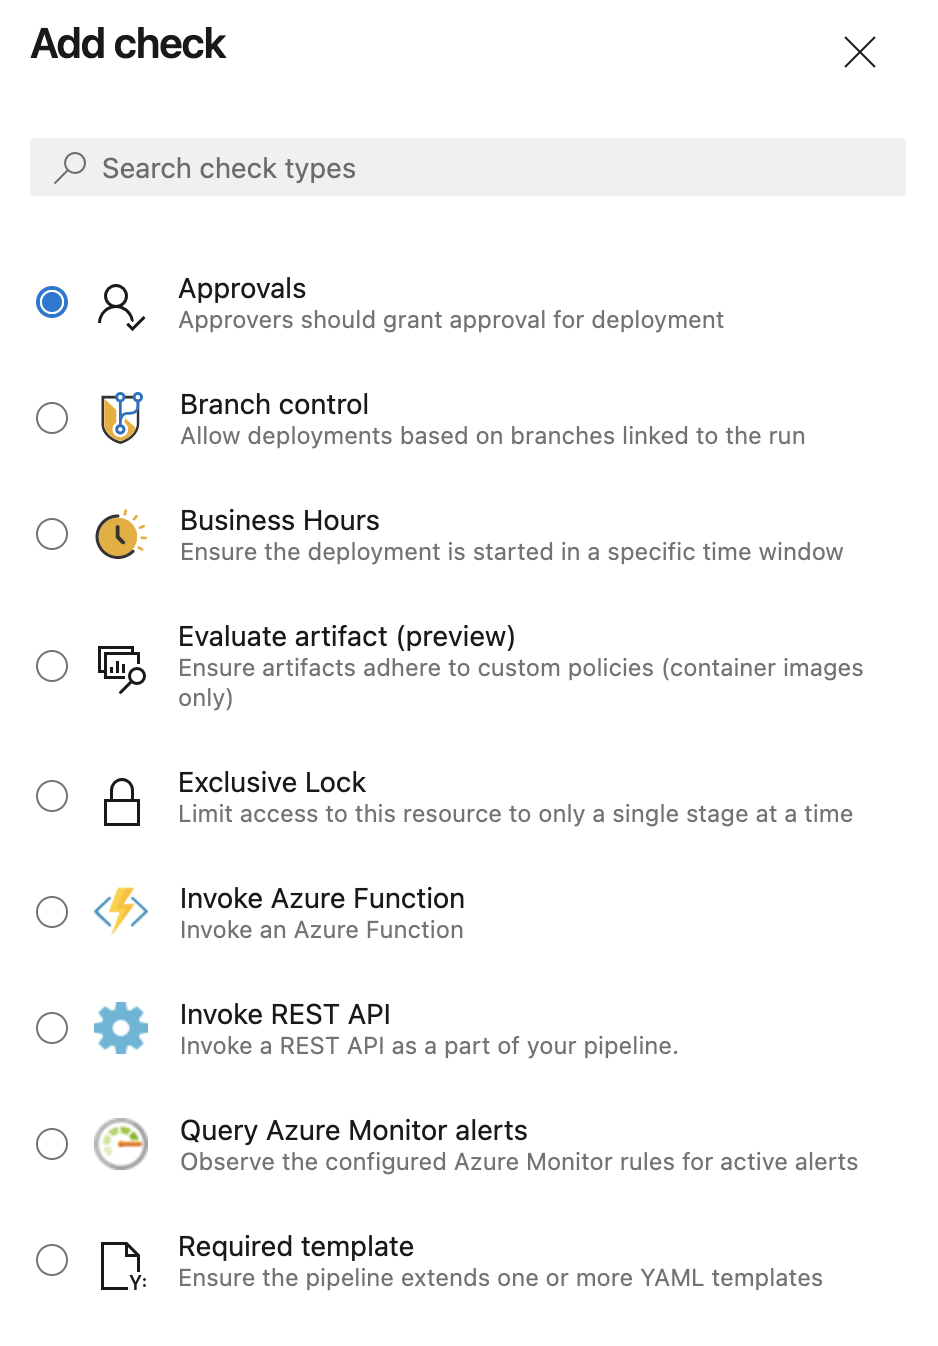
If you go inside the Production environement for example and hit the 3 dots on the top right corner, then select Approvals and checks you will be redirect to a configuration page for your environment. By clicking on the + button you will have a list of different options to control your environment:
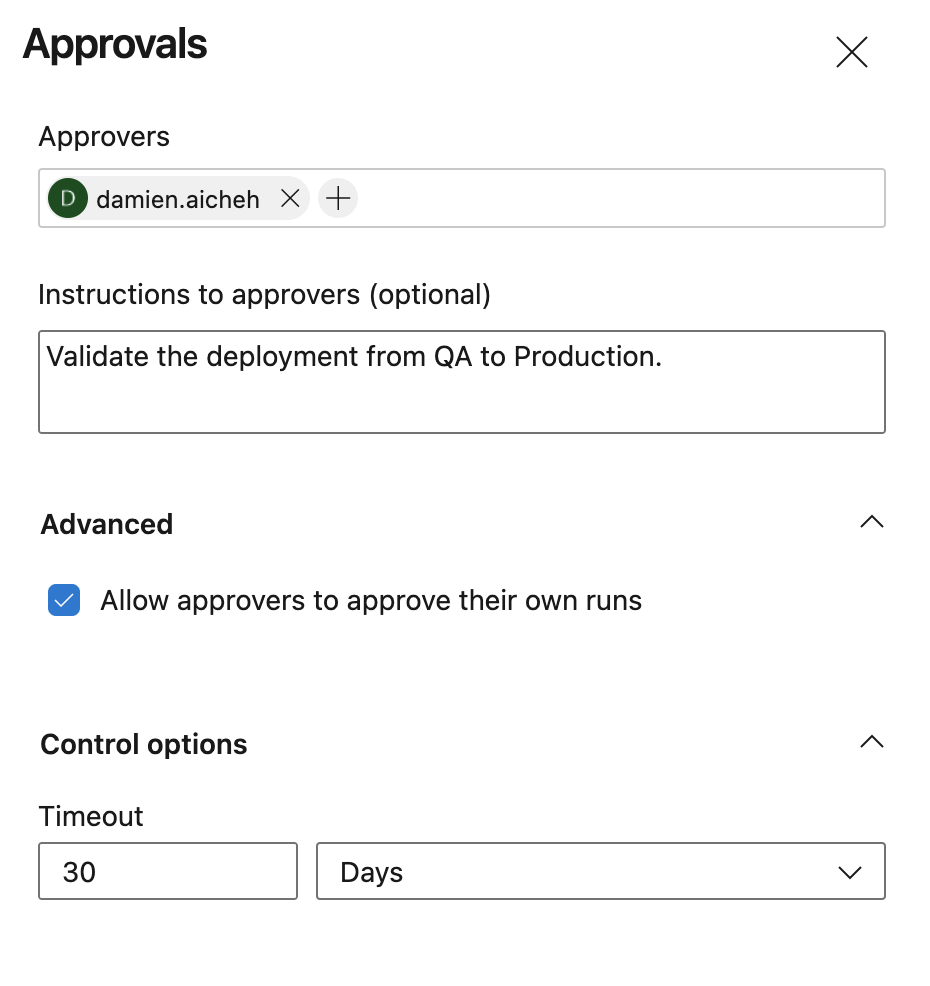
For our use case we will choose the Approvals and we can now add a list of people to validate the deployment from Staging to Production. We also have the ability to add a timeout of a maximum of 30 days to accept or reject this action.
Of course you can define different conditions for all your environments depending on your needs.
With this rule created on the Production environment when you will run your pipeline again you will see that the Production stage environment is waiting for a manual approval to confirm or not the deployment:
The users listed as approvator will received an email about it and they will be invite to accept or not the deployment to production inside Azure DevOps.
Final touch
As you saw it’s really easy to create and manage your releases using your environments. With this way you can now do it all using YAML and save it to your Git repository.
You will find full source code in this Github repository.
Happy coding!
You liked this tutorial? Leave a star in the associated Github repository!
Sources: