- Azure
- Azure DevOps
- Xamarin
- Xamarin.Android
- Android
When developing an application for Android, you will probably need to distribute it to your testers or your final users. In this tutorial we will discover how to setup the service connection to be able to upload your packages on the Google Play from Azure DevOps.
This article assumes that you have already built and signed an Android App Bundle (aab) in order to upload it.
Create the Google Service Account
First things to do is to login to developer console. On the left menu select Setup > API access, then inside the service accounts section select Create new service connection:

A popup will appear, click on the blue link to navigate to the Google Cloud Platform. You will arrive inside the IAM & Admin interface:

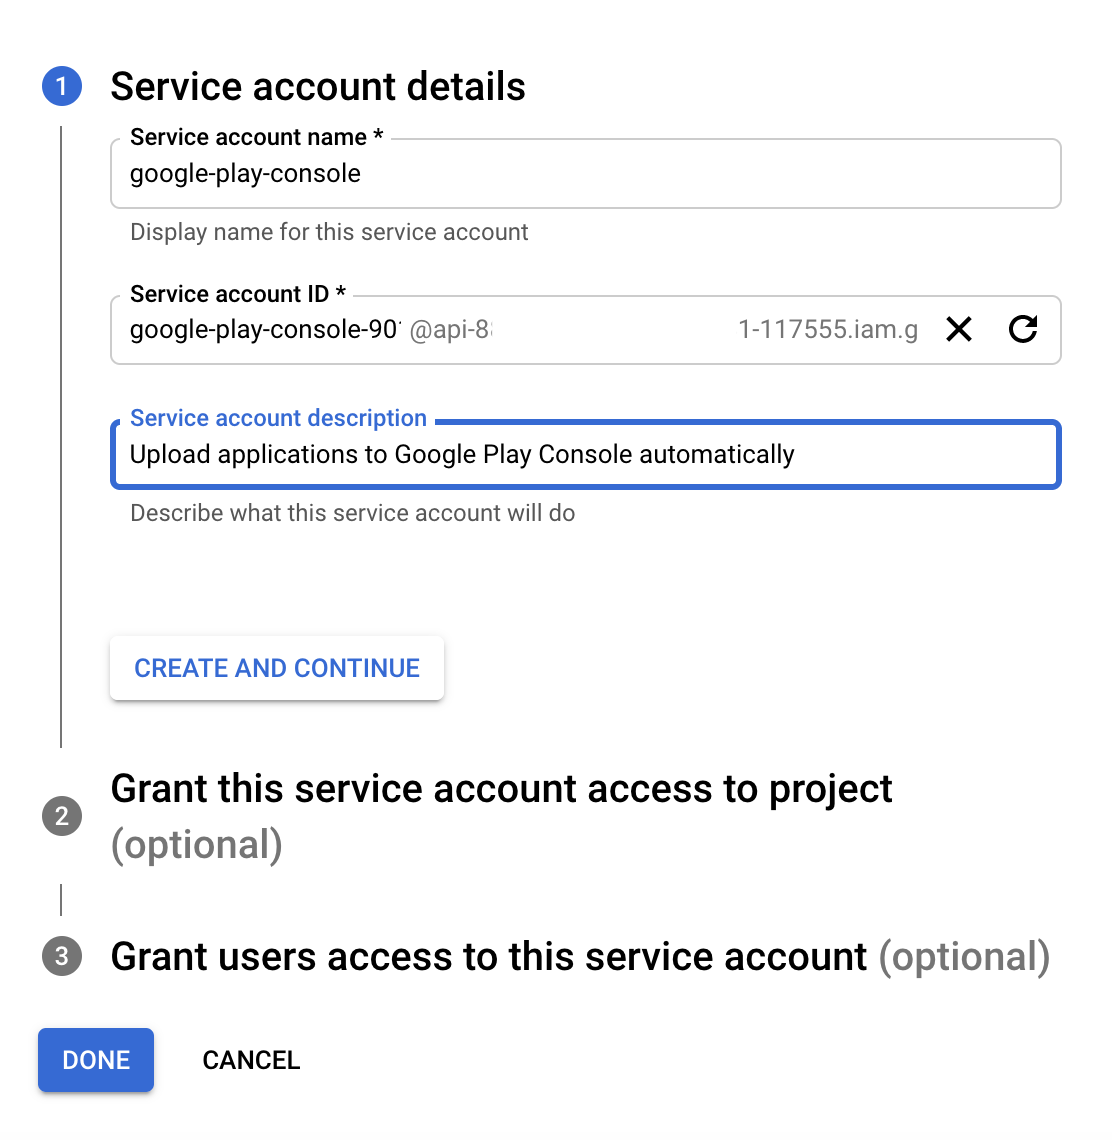
Then click on the create service account button to initialize it. Give it a name and a description so you can remember for which application you did it:

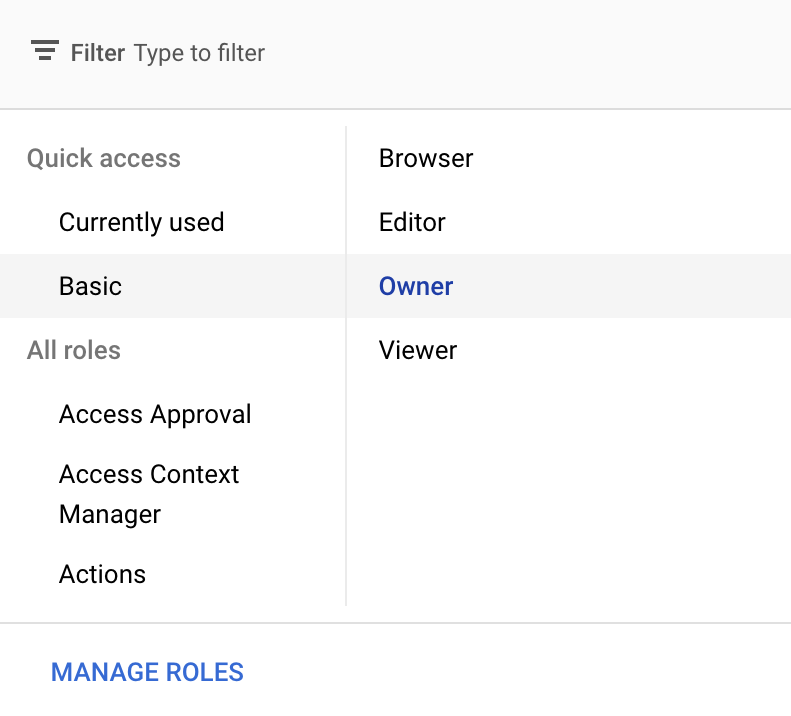
In the second step choose the Owner role for this service:

The last step can be left as is. Validate the creation and if it succeeds you will have something like this:

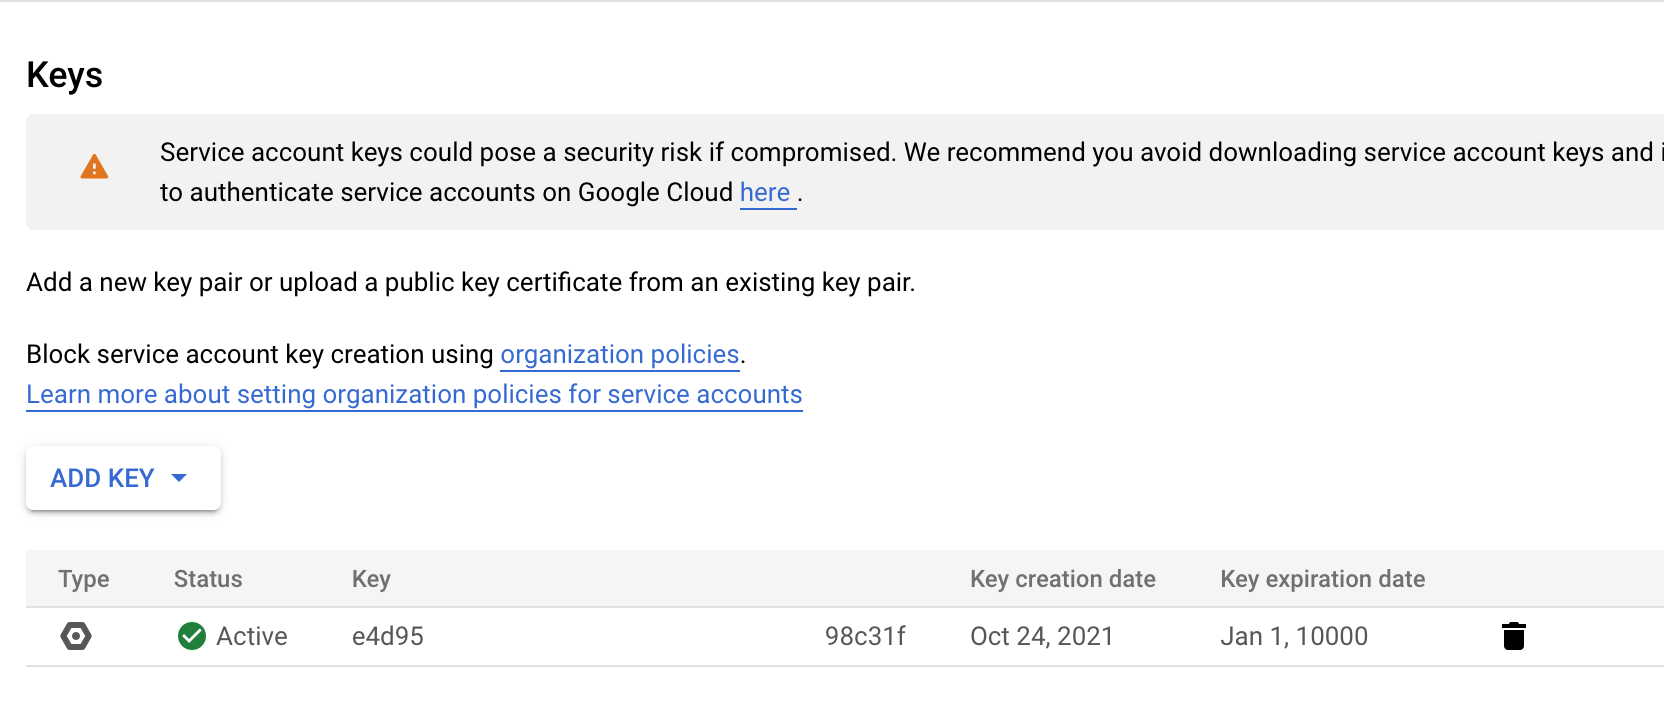
With this Google service created, we now need to create a service account key which will be used inside Azure DevOps later. To do so, click on the three little dots in the actions column on the right and select Manage Keys.
In the next page select Add Key then JSON and validate.

This will prompt a popup to download the key as a JSON file. Make sure to save it in a secure storage, a Key Vault for instance.
Final step, go back to the Google Play Console and inside the service connection section, click on the Grant Access button to invite your Google service account as a user of your Google Play Console account. A permission page will be prompt, leave the default options and validate.
Create the service connection
It’s time to create the service connection that will allow Azure DevOps to upload your package to the Google Play Console.
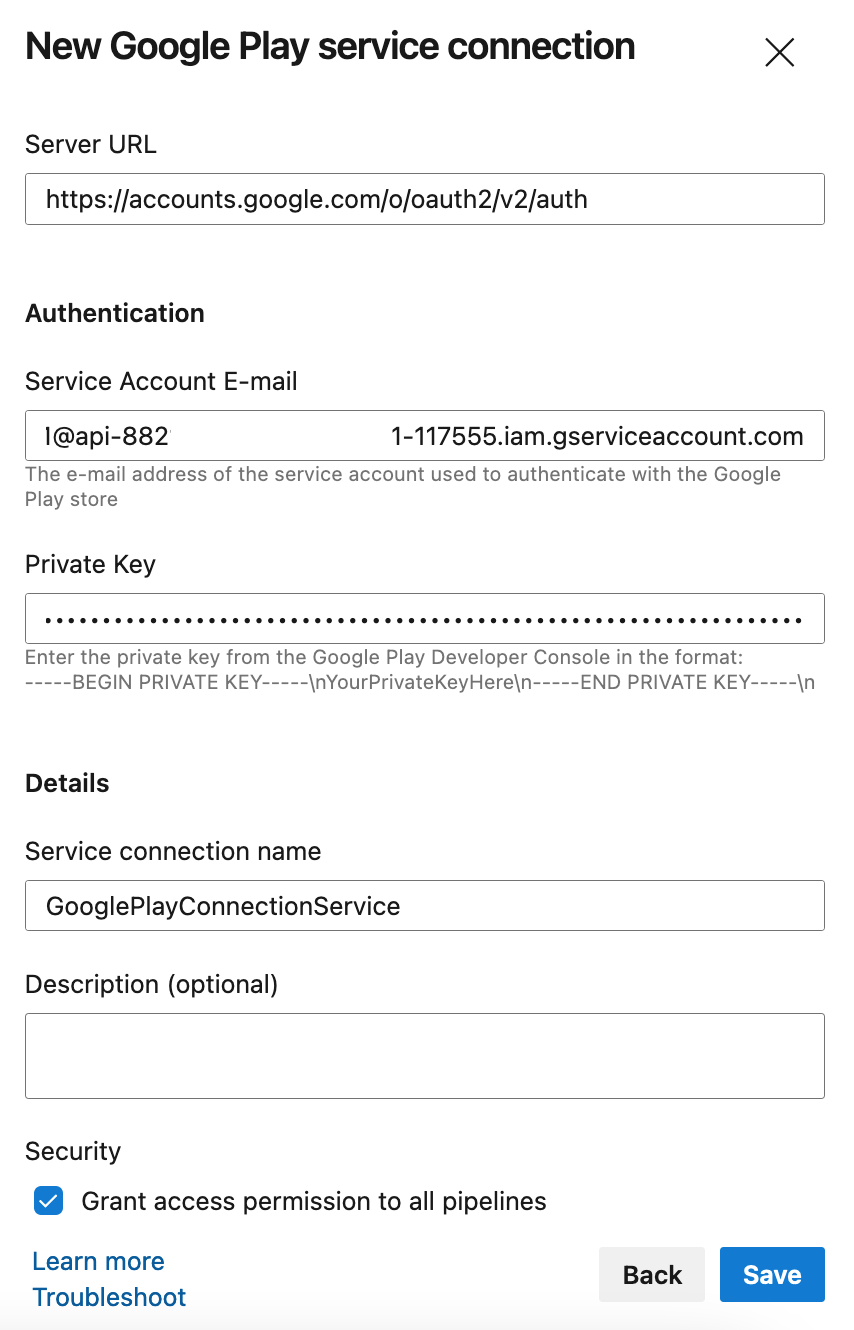
Inside Azure DevOps go to Project Settings > Service Connections and click on the New service connection button and select Google Play in the list.
In the email input you need to specify the email of the Google Service Account that you just created which finish with gserviceaccount.com.
Then add the private key of the Google Play Developer Console which is in the JSON file that you previously downloaded. Make sure to copy paste all the value of private_key:
{
  "type": "service_account",
  //...
  "private_key": "-----BEGIN PRIVATE KEY-----\nMIIEvQIBADANBgk......_KEYWGEAFRPqqAs=\n-----END PRIVATE KEY-----\n",
  //...
}
Finally give it a name (avoid using space), this will be used in your pipeline.

Use the Google Play Task
In your pipeline you can now use the official Google Play task. If this task is not already install into your organization, feel free to do it now otherwise you will not be able to access it in your pipelines.
Here is an example of YAML template that use this task:
jobs:
  - job:
    displayName: 'Google Play Store'

    steps:
      - task: DownloadBuildArtifacts@0
        displayName: 'Download artifacts'
        inputs:
          buildType: 'current'
          downloadType: 'specific'
          downloadPath: 'releases_drop'

      - task: GooglePlayRelease@4
        inputs:
          serviceConnection: 'GooglePlayConnectionService'
          applicationId: 'com.yourcompany.yourapp'
          action: 'SingleBundle'
          bundleFile: 'releases_drop/android_packages/*.aab'
          track: 'internal'
Assuming you already have your aab from a previous job, we download it from artifacts and upload it using the GooglePlayRelease@4 task with the GooglePlayConnectionService service connection.
When the pipeline will be executed your aab will be uploaded into the internal testing section of the Google Play. If you want to directly upload it in another environment (production for instance) look at the track option.
The first upload will be done manually to let Google Play initialize your application.
Final Touch
You are now able to upload your package directly to the Google Play Store in one click! This will allow anyone in your team to do it in a secure and autonomous manner.
Happy coding!