- Azure
- Azure DevOps
- Xamarin
- Xamarin.iOS
- iOS
When developing an application for iOS, you will probably need to distribute it to your testers or your final users. In this tutorial we will discover how to setup the your pipeline to be able to upload your packages on the App Store from Azure DevOps.
This article assumes that you have already built and signed an ipa with a provisioning profile for App Store in order to upload it.
Create the API Key access
First things to do is to login to App Store Connect with the owner account. If you have the correct rights you will see something like this:

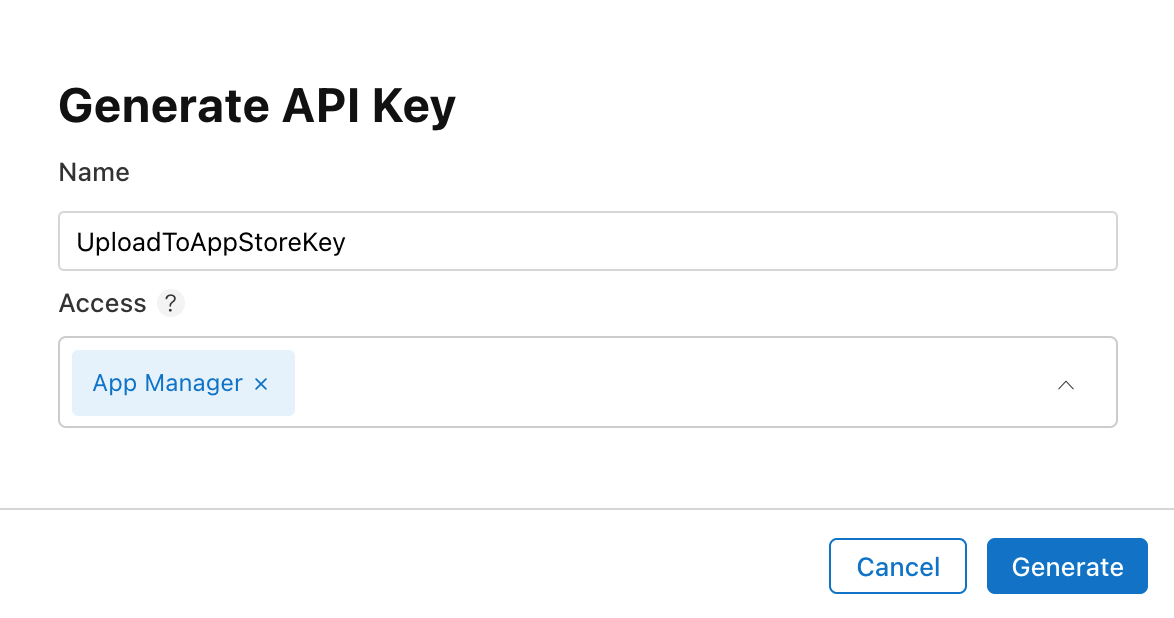
Inside the Keys tab, if it’s the first time, accept the terms and create an API Key. In the popup give a name that correspond to your application and give it an App Manager access:

When the API Key will be generated you will be able to download a .p8 file:

If you don’t see the download button, just refresh your page one time.
Be carefull, you will see the download button only once. So you need to save this file in a secure storage like a Key Vault to be able to retreive it when you will need it. Otherwise you will need to revoke the API Key and recreate it.
Retrieve the others identifiers
Now we need to retrieve a few identifiers to be able to configure our connection correctly:
- On the line of the API Key you just created you can get the KEY ID identifier
- At the top of the Keys tab you will find the Issuer ID:

- Finally on the App Store in the Information section of your application you need the Apple Id:

We are officially ready to setup our pipeline!
Use the App Store Release Task
In your pipeline you can now use the official App Store task. If this task is not already install into your organization, feel free to do it now otherwise you will not be able to access it in your pipelines.
Here is an example of YAML template that use this task:
jobs:
  - job:
    displayName: 'Apple Store'

    steps:
      - task: DownloadBuildArtifacts@0
        displayName: 'Download artifacts'
        inputs:
          buildType: 'current'
          downloadType: 'specific'
          downloadPath: 'releases_drop'

      - task: AppStoreRelease@1
        inputs:
          authType: 'ApiKey'
          apiKeyId: 'YOUR_KEY_ID'
          apiKeyIssuerId: 'YOUR_ISSUER_ID'
          apitoken: 'YOUR_API_KEY_ENCODED'
          releaseTrack: 'TestFlight'
          appIdentifier: 'com.yourcompany.yourapp'
          appType: 'iOS'
          ipaPath: releases_drop/ios_packages/*.ipa
          shouldSkipWaitingForProcessing: true
          shouldSkipSubmission: true
          appSpecificId: 'YOUR_APPLE_ID'
Assuming you already have your ipa from a previous job, we download it from artifacts and upload it using the AppStoreRelease@1 task.
As you can see you have the 3 identifiers we previously retrieved:
KEY_IDISSUER_IDAPPLE_ID
Concerning the API_KEY_ENCODED to generate it, just encode the content of the .p8 file as is. Do not change the format of the file otherwise it will not work. To convert your key to base64, put it in a txt file and run one of this command below, depending on your OS. You will get a file containing the base64 string that represent your API key.
Windows
certutil -encode data.txt tmp.b64 && findstr /v /c:- tmp.b64 > data.b64 && del tmp.b64
Mac
base64 -i data.txt -o data.b64
Ubuntu
base64 data.txt > data.b64
Of course, as all your credentials, this encoded API Keys must be save into your secrets variables inside Azure DevOps.
When the pipeline will be executed your ipa will be uploaded to TestFlight. If you want to directly upload it in another environment (production for instance) look at the releaseTrack option.
Final Touch
You are now able to upload your package directly to the App Store in one click! This will allow anyone in your team to do it in a secure and autonomous manner.
Happy coding!