- Azure
- Azure DevOps
- App Center
In this quick tutorial I m going to show you what you need to setup, to be able to deploy your application packages from Azure DevOps to App Center.
Why ?
The main goal is to be able to deploy your mobile applications generated by your Azure DevOps pipelines into App Center and share it with your testers.
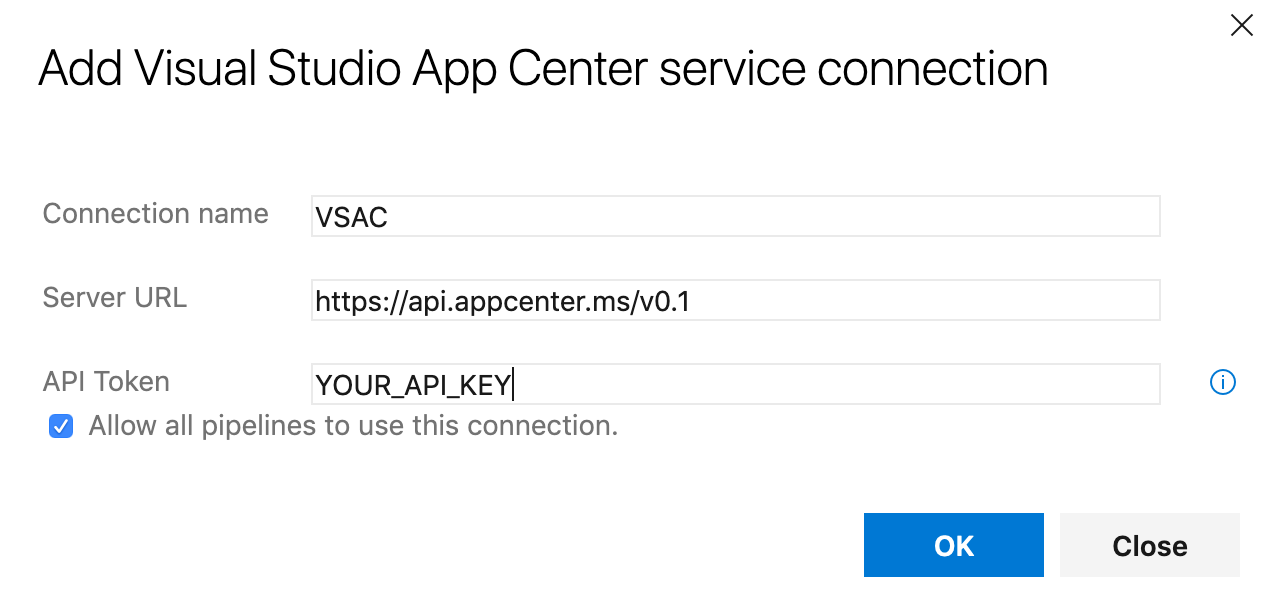
Create the service connection
To be able to publish your package in App Center we need to authorize Azure DevOps to be able to connect to it. To do that, go to App Center and inside your Profile > Account Settings > API Tokens, create a New API Token and be sure to give your key the Full Access. Copy the API token key, you will need it for the next step.
Warning: The token will never be visible after you close this view. Be sure to save it somewhere elese, otherwise you will need to recreate it.
Go back to Azure DevOps and inside Project Settings > Service connections create a new Visual Studio App Center connection, give it a name. I personnaly like to call it: VSAC (for Visual Studio App Center) and use the API token key you just create.
Now inside App Center, create a new application project depending on the type of application you have to deploy.
Create a distribution group
The goal of App Center when you deploy your application is to distribute it for different group of testers, so you can manage different versions of your application for these different groups of testers. For that we need two more things : the app slug and the distribution group identifier.
The app slug can be deducted by concatenating your username and application identifier separated by / for example the slug for:
https://appcenter.ms/users/damienaicheh/apps/myApplicationProject will be: damienaicheh/myApplicationProject.
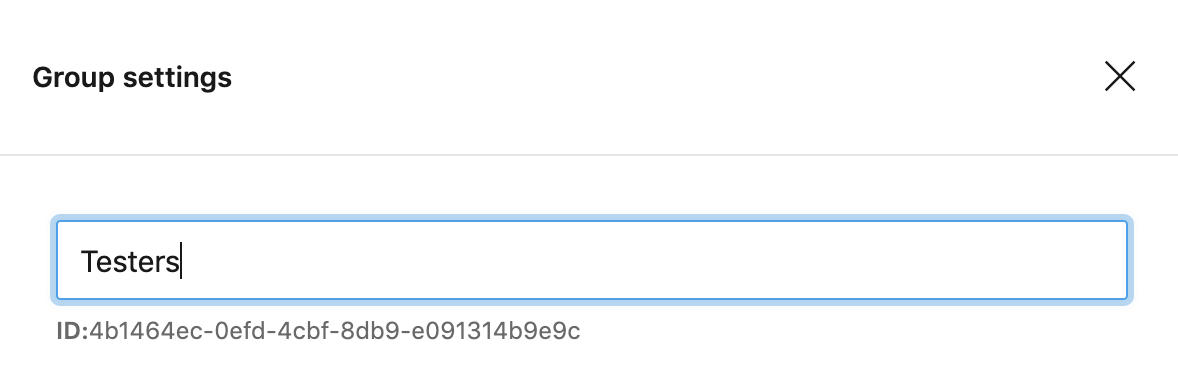
Final touch: get a distribution group. Each group of testers will have a unique group identifier. Following inside your App Center application, let’s create a distribution group. Then, inside Distribute > Groups create a new group and in the group settings panel, bellow his name, copy the group ID:
Now with your App Center connection setup, your app slug and group distribution ID created, you are ready to use the AppCenterDistribute@3 task in your Azure DevOps Pipeline.
Happy coding!
Sources: