- Azure
- Azure Container Apps
- Terraform
In this tutorial you will setup the Azure Container Registry to store the Docker images. You will also create the Docker images that you will use in the Azure Container Apps environment.
This tutorial is part of a full series of tutorials on using Azure Container Apps with Terraform.
Project structure
Let’s create a dedicated Terraform project called for instance fruits-on-azure-container-apps with this structure inside:
| - fruits-on-azure-container-apps
   | - .gitignore
The .gitignore will contains all terraform files that we want to ignore. It will look like this:
.terraform
*.tfstate
**/*.lock.*
**/*.tfplan
terraform.tfplan
terraform.tfstate.backup
plan.out
Initialize terraform
To be able to use Terraform with Azure, you need to install the Azure CLI and login to your Azure account. You can also use a Service Principal Name (SPN) to authenticate, all details can be found in the official documentation.
To be able to store the Terraform state in Azure, you need to create a Azure Storage Account and a container to store the state.
Then, log in to your subscription and create a resource group dedicated to the Terraform States, for instance rg-dev-terraform-states:
# Connect to Azure
az login
# Select the subscription
az account set --subscription <your-subscription-id>
# Create the resource group with the location of your choice
az group create --name rg-dev-terraform-states --location westeurope
And then run the following commands to create an Azure Storage Account and the container to store the Terraform state. Make sure to define your own Storage Account name which must be unique:
# Create the storage account
az storage account create -n <your-storage-account-name> \
                          -g rg-dev-terraform-states \
                          -l westeurope \
                          --sku Standard_LRS
Based on the command line below, to create the container called tfstates for the terraform states files you need to get one of the access key of your Storage Account. You can get it in the Azure Portal in the Access Keys section of your Storage Account:
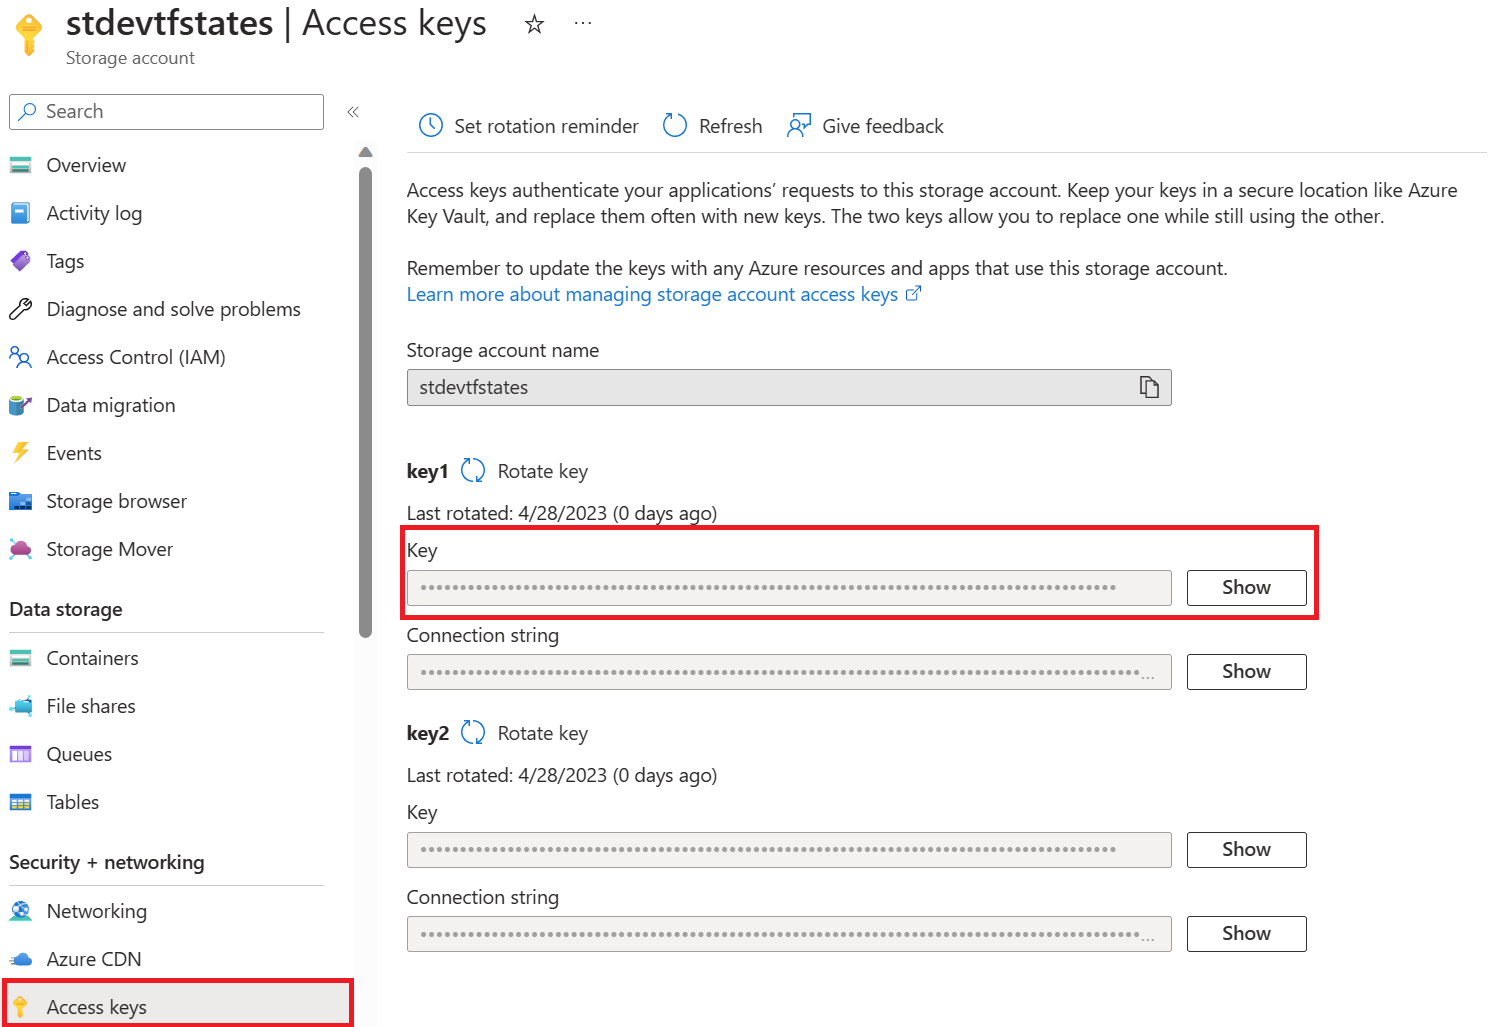
# Then create the tfstates container inside it

az storage container create -n tfstates \
                            --account-name <your-storage-account-name> \
                            --account-key <your-storage-account-key>
Let’s create a provider.tf file and declare the azurerm provider in it:
provider "azurerm" {
  features {
    log_analytics_workspace {
      permanently_delete_on_destroy = true
    }
  }
  skip_provider_registration = false
}

terraform {
  required_providers {
    azurerm = {
      source  = "hashicorp/azurerm"
      version = "~> 3.51.0"
    }
  }
  required_version = ">=1.4.5"

  backend "azurerm" {}
}
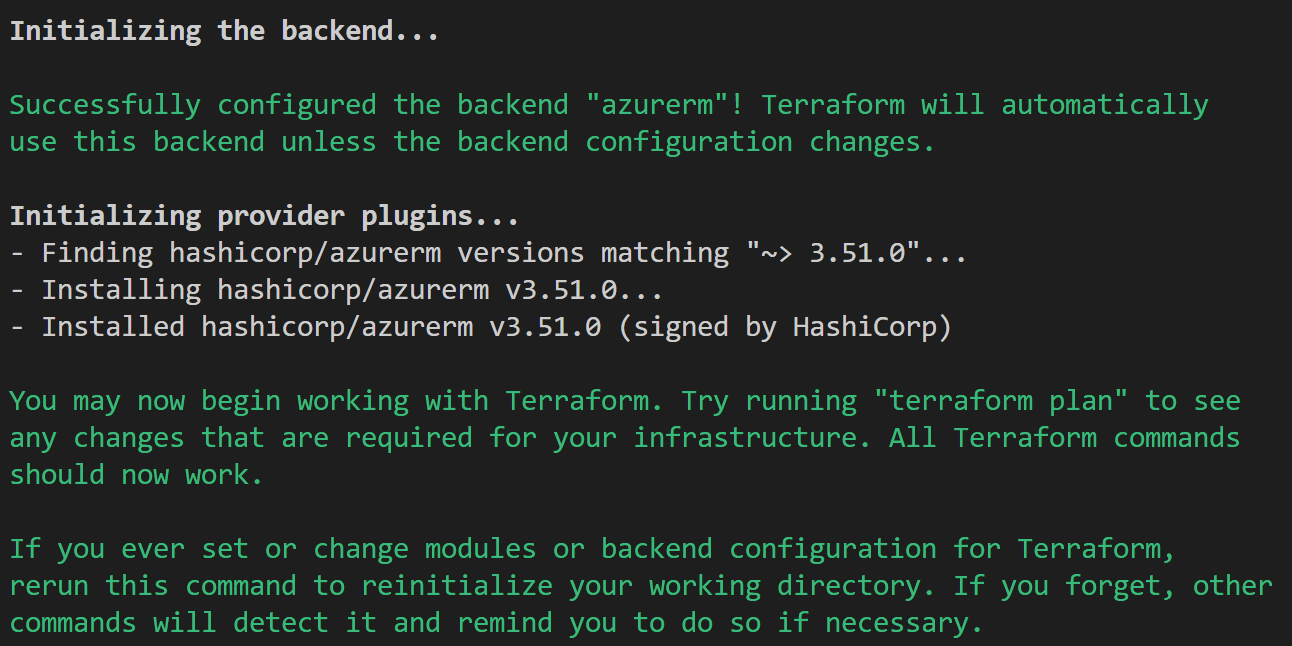
Now we can run the following command to initialize Terraform:
terraform init \
        -reconfigure \
        -input=false \
        -backend-config="resource_group_name=rg-dev-terraform-states" \
        -backend-config="storage_account_name=<your-storage-account-name>" \
        -backend-config="container_name=tfstates" \
        -backend-config="key=fruits.aca.terraform.tfstate"
If everything is ok you should see this kind of message in your terminal:
Define naming conventions
You will use the official naming convention for the ressources that you will create on Azure. All the abbreviations can be found in the documentation.
Let’s define this naming convention:
<!--If the resource prefix has a dash: -->
<service-prefix>-<environment>-<region>-<application-name>-<instance>
<!--If the resource does not autorize any special caracters: -->
<service-prefix><environment><region><application-name><instance>
So let’s create a variables.tf file and define all of these values as variables:
variable "environment" {
  description = "The environment deployed"
  type        = string
  default     = "dev"
  validation {
    condition     = can(regex("(dev|stag|prod)", var.environment))
    error_message = "The environment value must be valid."
  }
}

variable "region" {
  description = "Azure deployment region"
  type        = string
  default     = "we"
}

variable "application" {
  description = "The name of the application"
  type        = string
  default     = "frt"
}

variable "location" {
  description = "Azure deployment location"
  type        = string
  default     = "westeurope"
}

variable "resource_group_name_suffix" {
  type        = string
  default     = "01"
  description = "The resource group name suffix"
  validation {
    condition     = can(regex("[0-9]{2}", var.resource_group_name_suffix))
    error_message = "The resource group name suffix value is not a valid number."
  }
}

variable "repository" {
  description = "The repository name"
  type        = string
  default     = "fruits-on-azure-container-apps"
}

variable "creator" {
  description = "The name of the project's creator"
  type        = string
  default     = "terraform"
}

variable "tags" {
  type        = map(any)
  description = "The custom tags for all resources"
  default     = {}
}
Let’s define a resource suffix and the tags for your resources inside a locals.tf file:
locals {
  resource_lowercase_array  = [lower(var.environment), lower(var.region), lower(var.application), var.resource_group_name_suffix]
  resource_suffix_kebabcase = join("-", local.resource_lowercase_array)
  resource_suffix_lowercase = join("", local.resource_lowercase_array)

  tags = merge(
    var.tags,
    tomap(
      {
        "Creator"     = var.creator,
        "Environment" = var.environment,
        "Region"      = var.region,
        "Repository"  = var.repository,
        "Application" = var.application,
      }
    )
  )
}
This will be used to define the suffix of all the resources that we will create.
Create a resource group
First thing you need to do is to create a resource group to store all the resources that we will create. To do that, create a file called rg.tf and add this code:
resource "azurerm_resource_group" "this" {
  name     = format("rg-%s", local.resource_suffix_kebabcase)
  location = var.location
  tags     = local.tags
}
Create the docker image registry
To store the Docker images you have 2 options:
- Use the Azure Container Registry service
- Use Docker Hub directly
In this tutorial we will use the Azure Container Registry service. To do that, create a file called acr.tf and add this code:
resource "azurerm_container_registry" "this" {
  name                = format("cr%s", local.resource_suffix_lowercase)
  resource_group_name = azurerm_resource_group.this.name
  location            = azurerm_resource_group.this.location
  sku                 = "Basic"
  admin_enabled       = true
}
As you can see you need to enable the admin mode to be able to use the credentials in the Azure Container Apps. You can also specify the SKU that you want to use. In this tutorial we will use the Basic SKU.
Run Terraform
Let’s run Terraform plan command and apply it:
terraform plan --out=plan.out
Then:
terraform apply plan.out
Create the docker images
Now that we have our registry we can create our docker images. You have 2 images to build, one for the frontend and one for the backend API.
The frontend image
Let’s clone the repository that contains the frontend application and run the docker build command in it:
docker build -t <your-container-registry-name>.azurecr.io/fruits-frontend:1.0.0 .
You can of course specify the name and tag for the image of your choice. In this tutorial we will use the following name and tag: <your-container-registry-name>.azurecr.io/fruits-frontend:1.0.0.
The backend image
Let’s clone the repository that contains the backend API and run the docker build command:
docker build -t <your-container-registry-name>.azurecr.io/fruits-backend:1.0.0 .
The name and tag for this image will be <your-container-registry-name>.azurecr.io/fruits-backend:1.0.0.
Push the images to the registry
Now that we have our images we can push them into the registry. Connect to Azure Container Registry:
# Connect to the registry
az acr login --name <your-container-registry-name>
Make sure you have the <your-container-registry-name>.azurecr.io/ prefix to be able to push your Docker images.
Push the images:
# Push the frontend image
docker push crdevwefrt01.azurecr.io/fruits-frontend:1.0.0
# Push the backend image
docker push crdevwefrt01.azurecr.io/fruits-backend:1.0.0
Check images locally with Docker
This part is optional but it can be useful to check that the images are correctly build before deploying them to Azure Container Apps. To do that you will need to run a mongodb container locally.
First, create a Docker local network called fruits-network:
docker network create fruits-network
This will allow the frontend, backend and mongodb containers to communicate together.
Instanciate the mongodb container, choose the username and passwords you want, you will need them to connect to the database from the backend image:
docker run --name mongodb \
           --network=fruits-network \
           -e MONGODB_USERNAME=ratingsuser \
           -e MONGODB_PASSWORD=ratingspassword \
           -e MONGODB_DATABASE=ratingsdb \
           -e MONGODB_ROOT_USER=root \
           -e MONGODB_ROOT_PASSWORD=ratingspassword \
           -it bitnami/mongodb:latest
As you can see above the container is running inside the fruits-network network.
Next, run the backend image and pass the MONGODB_URI environment variable. The MONGODB_URI must be in this format mongodb://[username]:[password]@[endpoint]:27017/ratingsdb
docker run --name api \
           --network=fruits-network \
           -p 3000:3000 \
           -e MONGODB_URI=mongodb://ratingsuser:ratingspassword@mongodb:27017/ratingsdb \
           -it --rm <your-container-registry-name>.azurecr.io/fruits-backend:1.0.0
If you go to http://localhost:3000/api/items you should see the list of fruits in the database.
Finally, run the frontend image and pass the API environment variable:
docker run --name web \
           --network=fruits-network \
           -p 8080:8080 \
           -e API=http://api:3000 \
           -it --rm <your-container-registry-name>.azurecr.io/fruits-frontend:1.0.0
If everything is ok you should be able to access the application at http://localhost:8080 and see something like this:
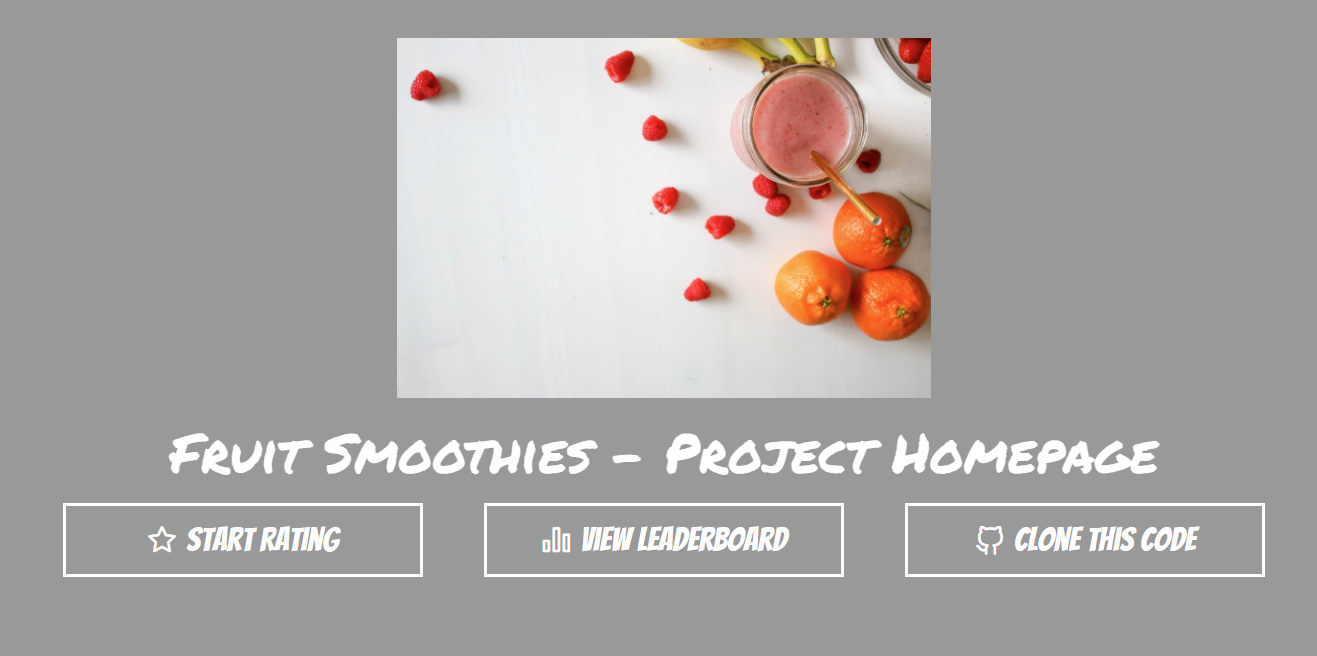
You can vote for your favorite fruit and see the results in the leaderboard.
Final touch
You have your Azure Container Registry and your Docker images ready to be used in the Azure Container Apps environment. You will find the complete source code in this Github repository.
What’s next?
In the next tutorial of this series we will focus on creating the Azure Container Apps environment.