- Azure
- Azure DevOps
When developing a mobile application you need to deliver an apk on a regular basis, for example when you want to update your application on the Google Play Store.
Quick reminder
To do that you need to follow a few steps :
- Build your application in Release mode
- Sign it using the keystore file
- Save the signed apk and upload it to a store
Of course, you can do all these steps manually but:
- It will be repetitive
- It’s time-consuming and time is money
- You will probably make some errors
Introducing Azure DevOps
The idea is to automate this process using a really good tool: Azure DevOps, this process is called continuous integration.
The interest of using Azure DevOps is that:
- It can be accessible from everywhere
- You will not be in charge of server maintenance
- It is not very expensive compared to the gain that it brings on your projects
We will create something called a pipeline that will allow you to generate your apk with just one click. To achieve that we will use the Azure Pipelines.
Build your own pipeline
Setup the project
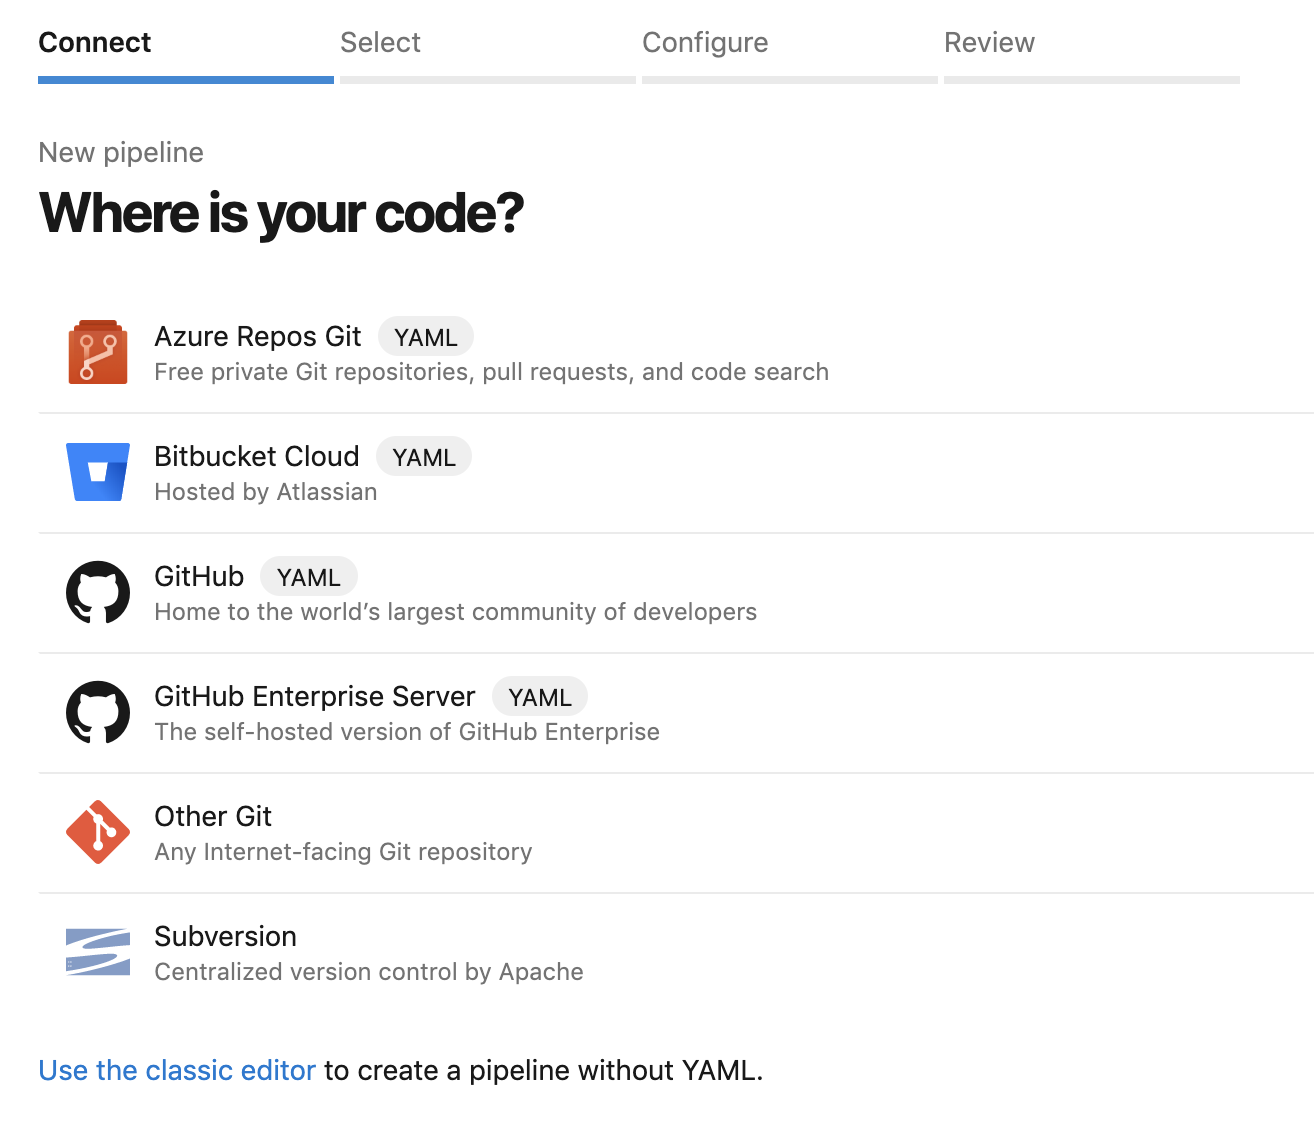
Go to Azure DevOps and inside the Pipelines and Builds/Pipelines section create a new project, then follow the 4 steps to get the source code from the correct repository :
Azure DevOps will automatically create a new file at the root of your project folder called azure-pipelines.yml, you will need to commit this file to your code repository.
It contains the job definition for your project defined using yaml, it will be interpreted by Azure DevOps to know how to build and sign your application.
What is interesting with this sort of job definition is :
- You keep your build jobs with your source code using the
azure-pipelines.yml yamlis easy to read and maintain- If you migrate to another Azure account you keep your jobs configurations
Default configuration
Go to your Azure DevOps project, and edit the pipeline, the azure-pipelines.yml will open and on the top of it you will see these lines:
trigger:
- master

pool:
 vmImage: 'ubuntu-latest'

steps:
As you can see, every time something is pushed on the master branch a new build will start on a virtual machine with the latest Ubuntu version.
Let’s change the vmImage to a Mac one, this will fix a problem of path for the zipalign tool:
pool:
 vmImage: 'macOS-10.13'
Next, we need to create our different tasks below the steps definition to define or pipeline.
Build your application using Gradle
To build an Android project, the good practice now is to use Gradle so let’s add this task:
- task: Gradle@2
  inputs:
    workingDirectory: ''
    gradleWrapperFile: 'gradlew'
    gradleOptions: '-Xmx3072m'
    javaHomeOption: 'JDKVersion'
    jdkVersionOption: '1.8'
    jdkArchitectureOption: 'x64'
    publishJUnitResults: false
    testResultsFiles: '**/TEST-*.xml'
    tasks: 'assembleRelease'
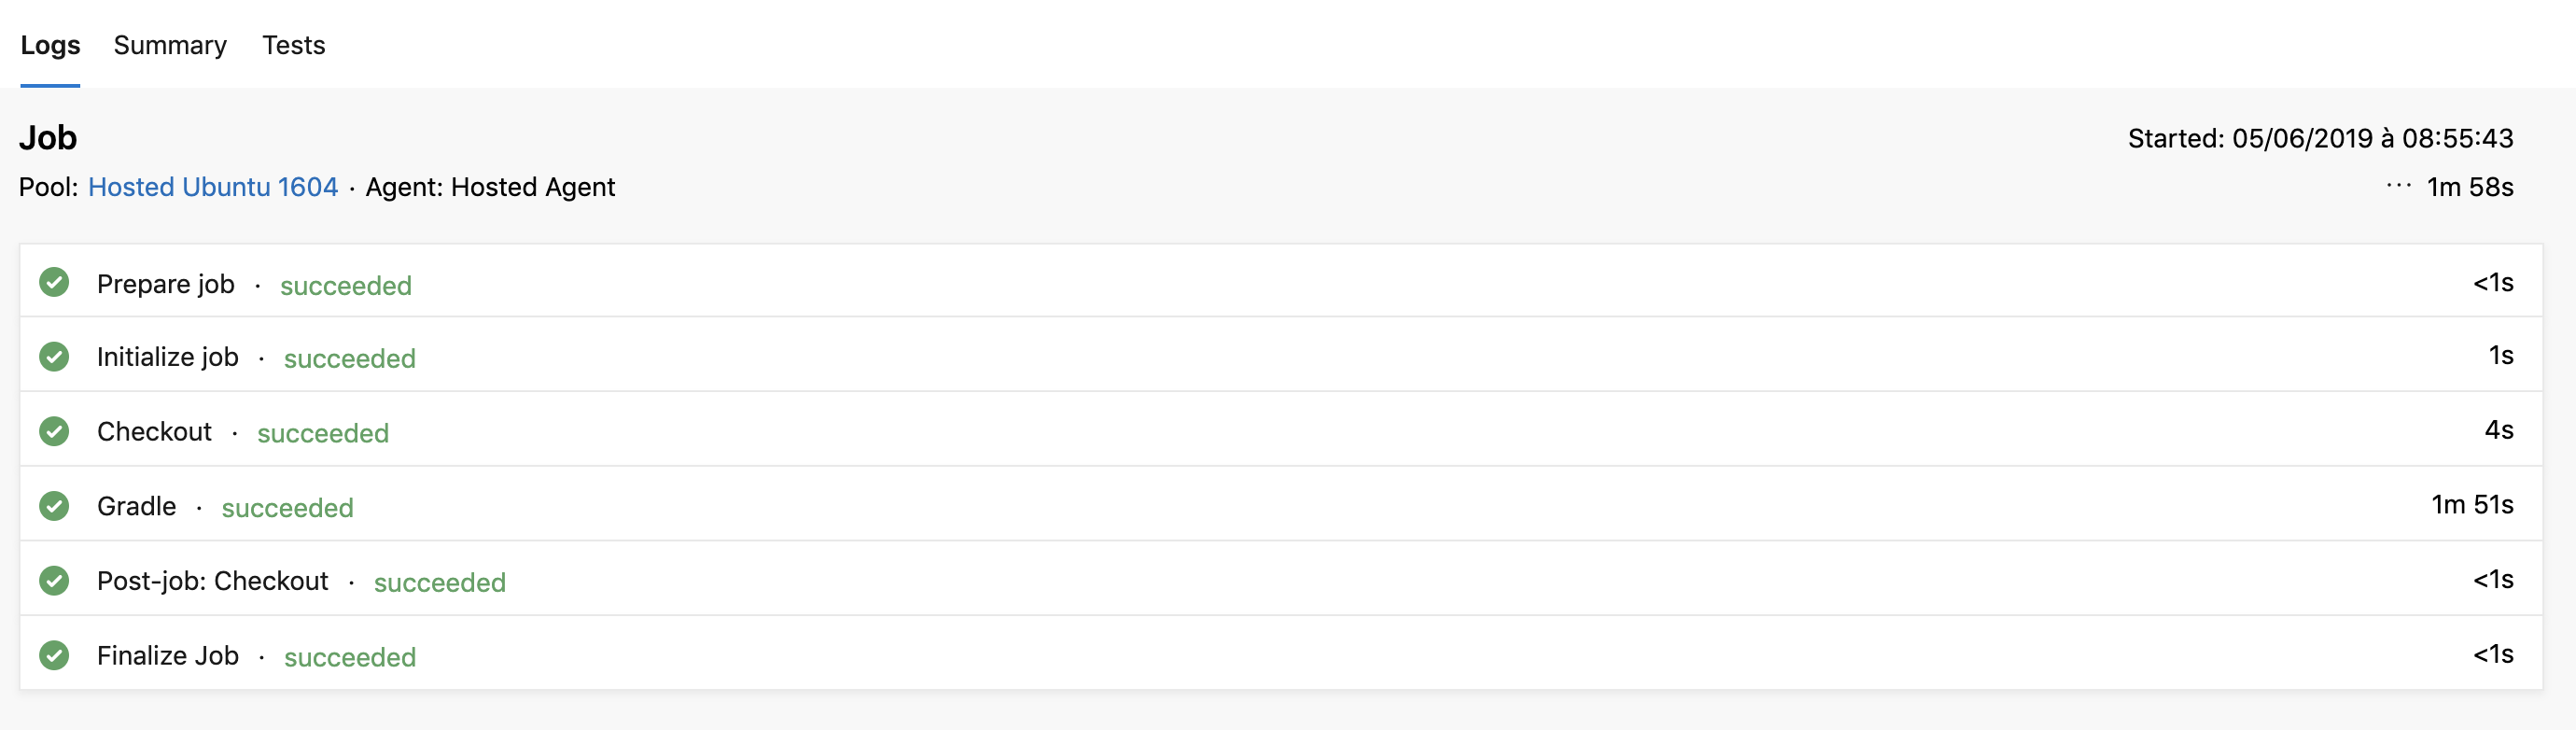
For the tasks parameter I choose assembleRelease because I want to build in the default Release mode. Feel free to set the correct Gradle configuration depending on your project’s need. Now if you start the job you should have everything succeeded:
Sign your application
Now it’s time to sign our application that we just built using the keystore. Remember, without signing the application you wont be able to install it on a device or upload it to the store.
Below the Gradle build task add a new task to sign your Android application:
For the purpose of the tutorial data for the keystore are visible, but you need to use the secrets variables instead like recommended by Microsoft. If you are not familiar with this you can look at my tutorial about it.
- task: AndroidSigning@3
  inputs:
    apkFiles: '**/*.apk'
    apksign: true
    apksignerKeystoreFile: 'production.keystore'
    apksignerKeystorePassword: 'keystorepwd'
    apksignerKeystoreAlias: 'key0'
    apksignerKeyPassword: 'aliaspwd'
    apksignerArguments: --out $(Build.SourcesDirectory)/app/build/outputs/apk/release/my-crazy-app.release.apk
    zipalign: true
I recommend you to specify the apksignerArguments as I did to give a new name for the signed apk. If you don’t do that the signed apk will have the same name as the unsigned one. If you queue the job now, you will get this error :

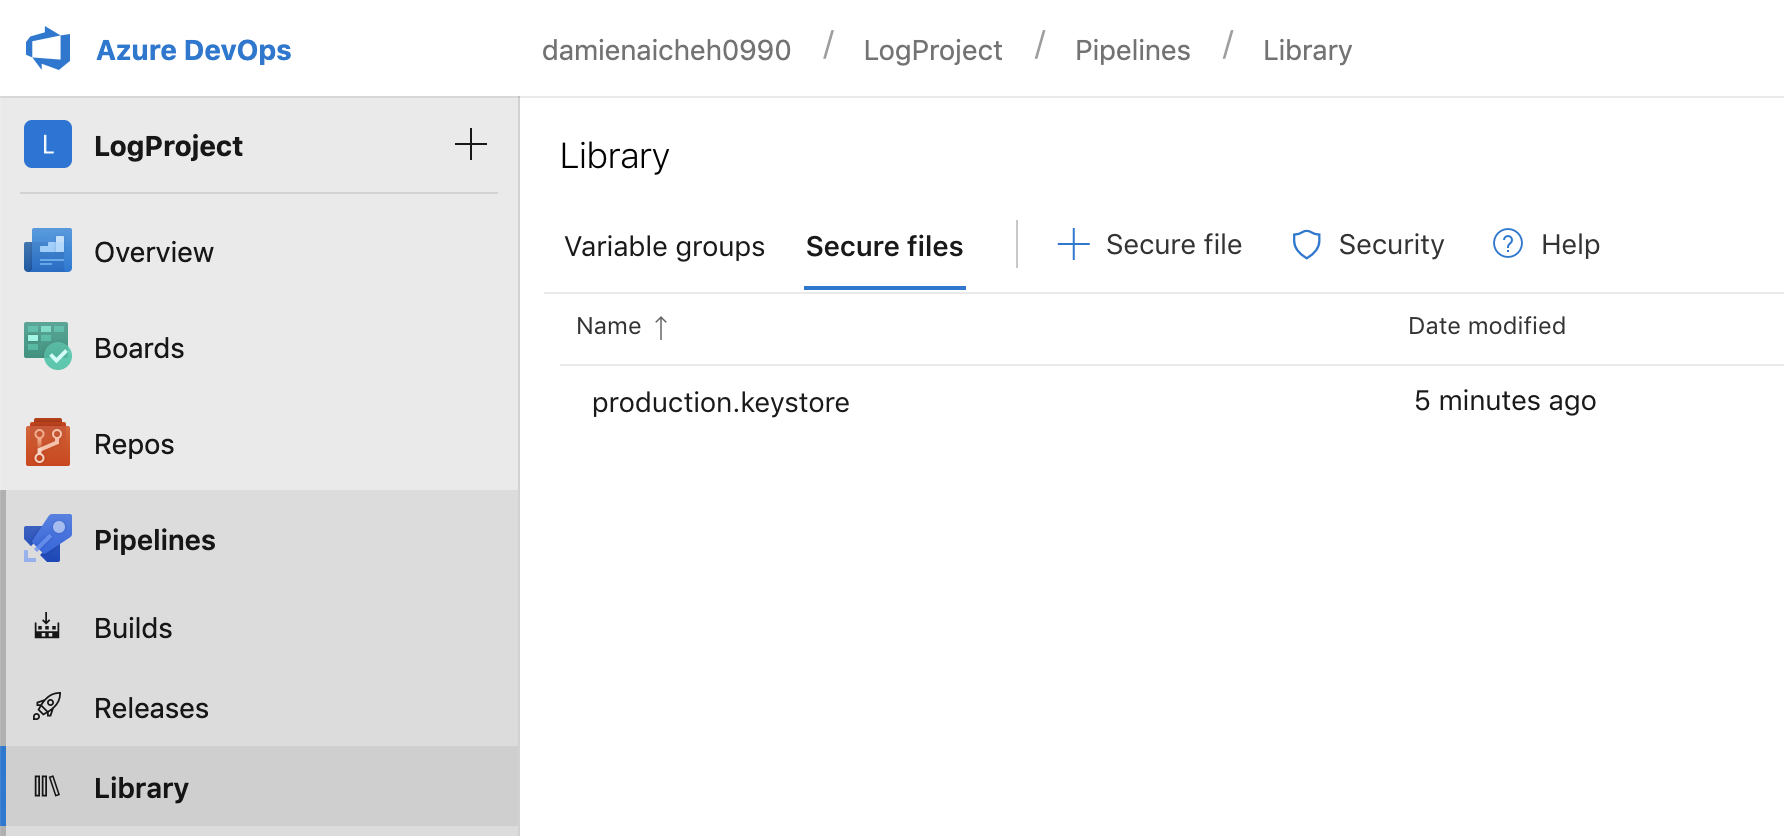
This error tell you that the keystore is not found because the pipeline has no access to it. To resolve this issue go to Pipelines and Library section then, in the Secure files tab where you need to upload your keystore:
Then go back to the last failed job and click to the Authorize resources button to be able to use it without any error. You can now restart the build without error.
Generate the artifact
We have our apk builded and signed, it’s time to get the apk generated on our machine. We first need to copy the apk to the artifact directories with a first task. Notice that I choose all the apk files that end with .release.apk like defined previously in the Android Signing task.
- task: CopyFiles@2
  inputs:
    SourceFolder: $(Build.SourcesDirectory)
    contents: '**/*.release.apk'
    targetFolder: '$(build.artifactStagingDirectory)'
    overWrite: true
Final step we publish the artifacts so it can be available to download by clicking on the Artifacts button.
- task: PublishBuildArtifacts@1
  inputs:
    pathtoPublish: '$(Build.ArtifactStagingDirectory)/app/build/outputs/apk/release/'
    artifactName: 'apks'
    publishLocation: 'container'
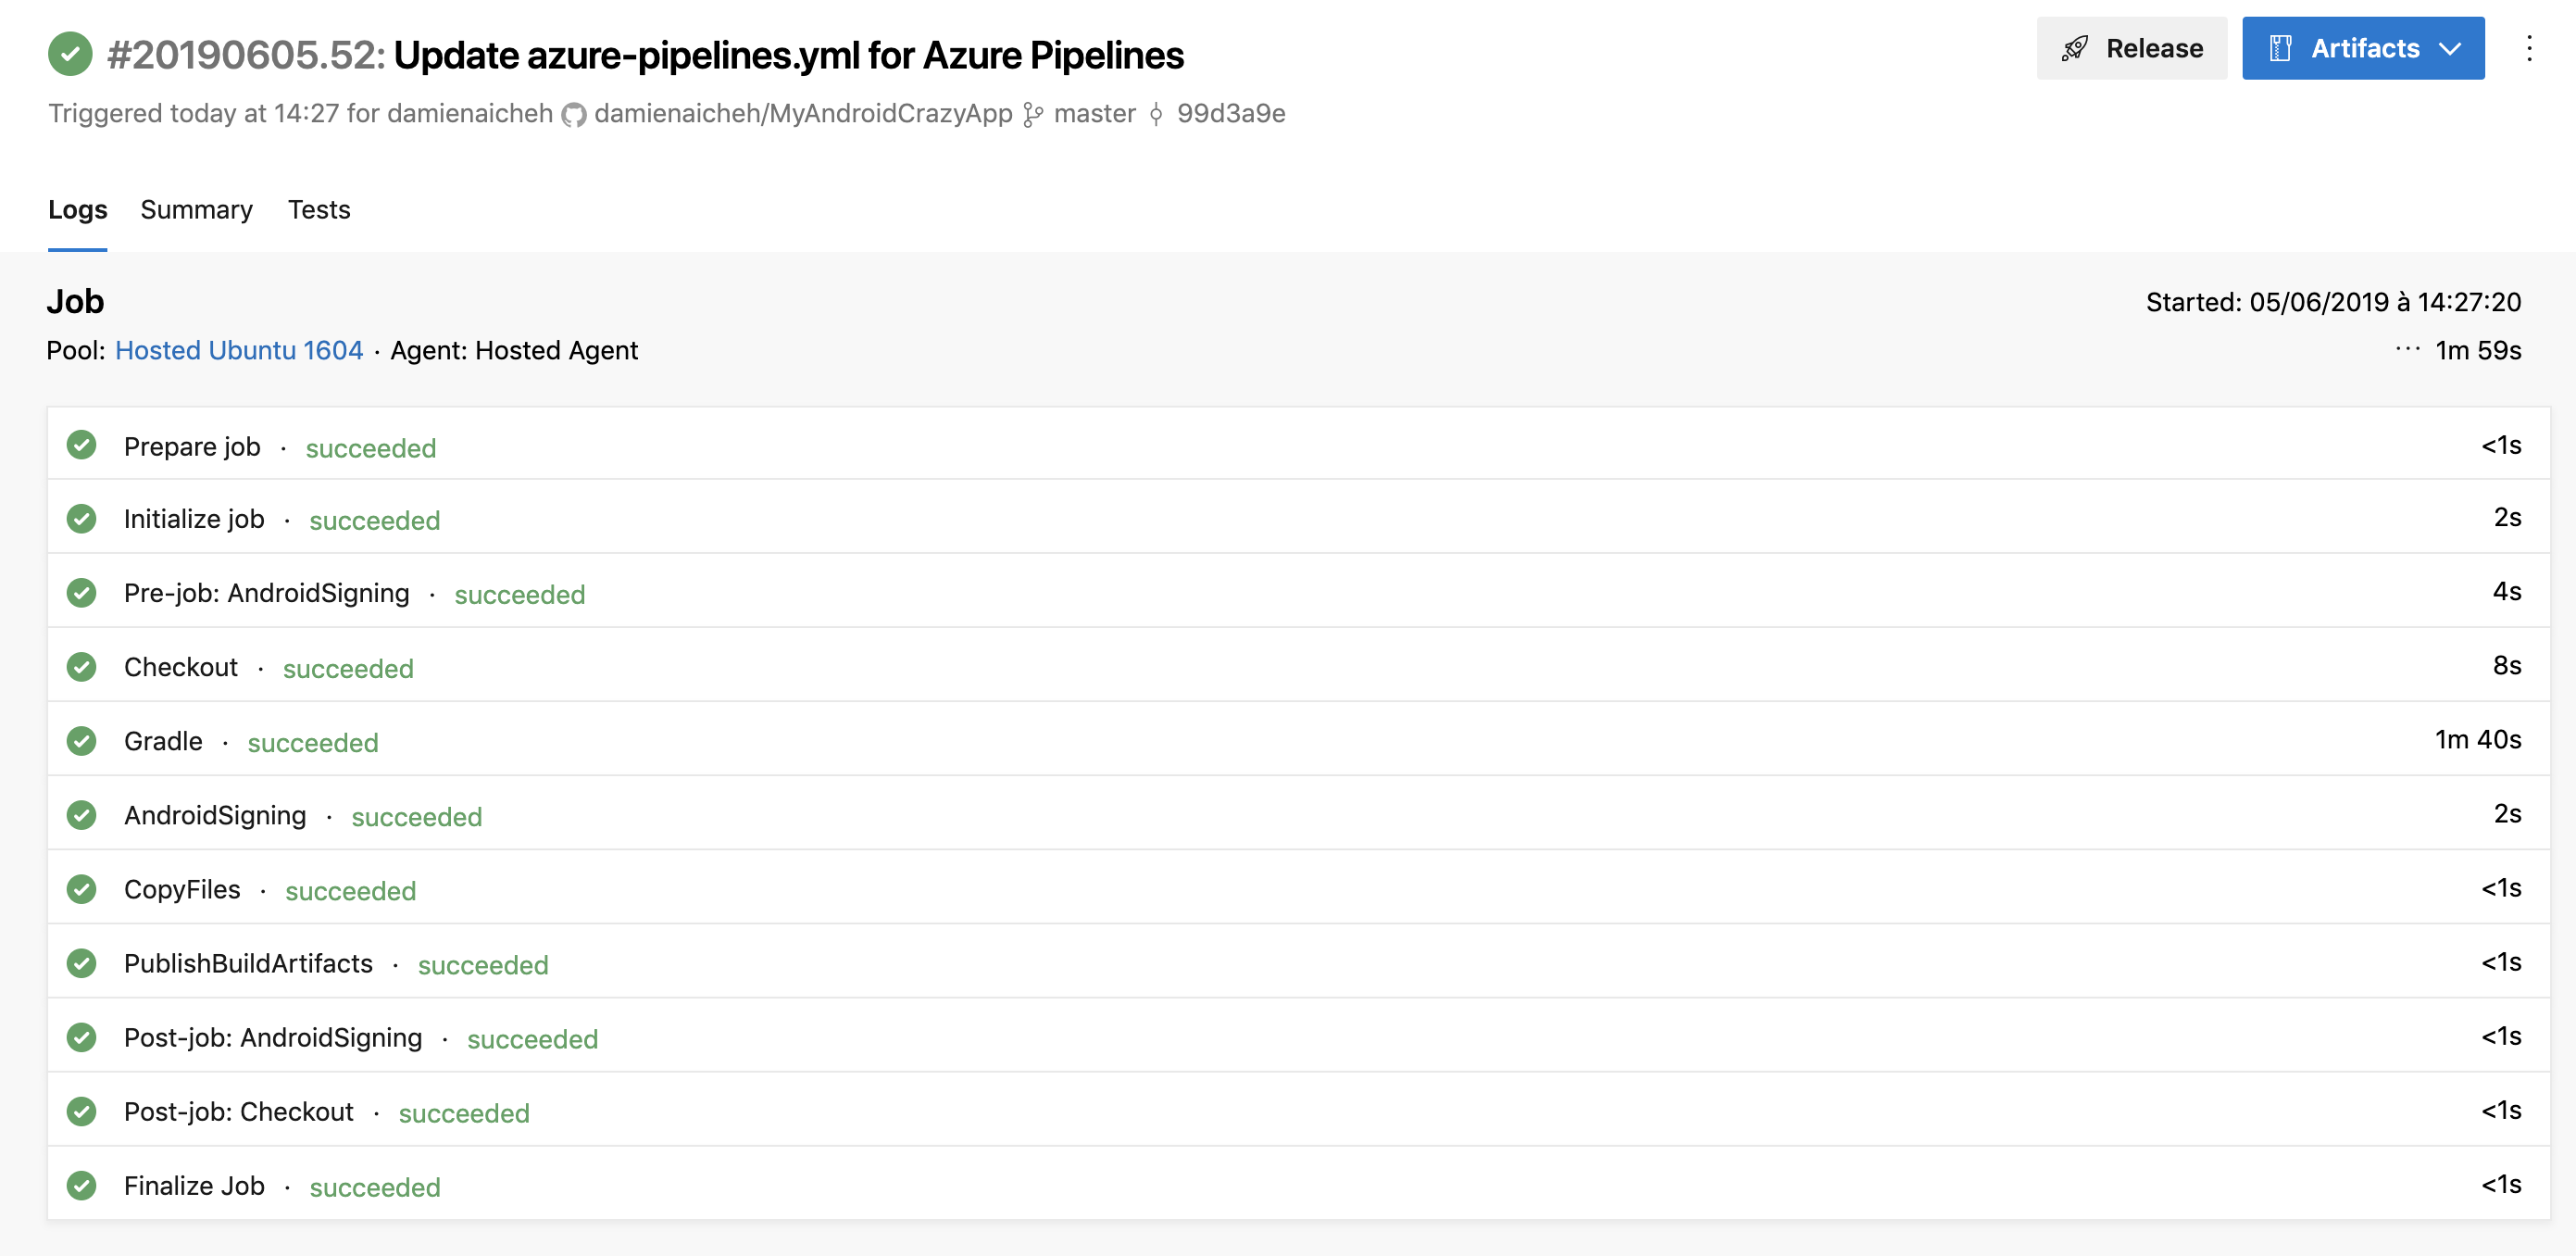
If everything is going well you will see something like this :
Sources:
You will find full source code in this Github repository.
Happy coding!
You liked this tutorial? Leave a star in the associated Github repository!