- Azure
- Azure Container Apps
- Terraform
In this tutorial you will finalize the terraform definition you did in the previous tutorial for your frontend and backend containers using Terraform. The source code is available in this Github repository.
This tutorial is part of a full series of tutorials on using Azure Container Apps with Terraform.
Use secrets
In the two containers app you need specify password to access the Azure Container Registry to retrieve the Docker images. To do that, you need to define the password_secret_name attribute of the registry block inside the azurerm_container_app resource.
So inside your container-api.tf and container-web.tf files, you need to declare a secret to store the admin password of the Azure Container Registry just before the registry block:
secret {
  name  = "container-registry-password"
  value = azurerm_container_registry.this.admin_password
}
As you can see the secret is defined with the name container-registry-password. Now you can use this name as a reference to consume it in the registry block.
registry {
  server               = azurerm_container_registry.this.login_server
  username             = azurerm_container_registry.this.admin_username
  password_secret_name = "container-registry-password"
}
Define environment varibles
In the backend container you need to define the MONGODB_URI environment variable to connect to the Azure Cosmos Db database. To do that, you need to define an env attribute in the container attribute of your azurerm_container_app resource.
Remember that you don’t want to expose the connection string in clear text, you will use a secret to store it and reference it inside the environment variable.
So inside your container-api.tf file, you will add a secret:
secret {
  name  = "mongodb-connection-string"
  value = azurerm_cosmosdb_account.this.connection_strings[0]
}
and the env attribute to your container container block:
env {
  name        = "MONGODB_URI"
  secret_name = "mongodb-connection-string"
}
In the frontend container you need to define the API environment variable to connect to the backend container, so just reference the fqdn of the backend container. In the container-web.tf file, you will have this code in your your container block:
env {
  name  = "API"
  value = format("https://%s", azurerm_container_app.api.latest_revision_fqdn)
}
Recap
So your container-api.tf file should look like this:
resource "azurerm_container_app" "api" {
  name                         = format("ca-api-%s", local.resource_suffix_kebabcase)
  container_app_environment_id = azurerm_container_app_environment.this.id
  resource_group_name          = azurerm_resource_group.this.name
  revision_mode                = "Single"

  lifecycle {
    ignore_changes = [
      template.0.container[0].image
    ]
  }

  secret {
    name  = "container-registry-password"
    value = azurerm_container_registry.this.admin_password
  }

  secret {
    name  = "mongodb-connection-string"
    value = azurerm_cosmosdb_account.this.connection_strings[0]
  }

  registry {
    server               = azurerm_container_registry.this.login_server
    username             = azurerm_container_registry.this.admin_username
    password_secret_name = "container-registry-password"
  }

  ingress {
    external_enabled = true
    target_port      = 3000
    traffic_weight {
      percentage      = 100
      latest_revision = true
    }
  }

  template {
    container {
      name   = format("ca-api")
      image  = "crdevwefrt01.azurecr.io/fruits-backend:1.0.0"
      cpu    = 0.25
      memory = "0.5Gi"

      env {
        name        = "MONGODB_URI"
        secret_name = "mongodb-connection-string"
      }
    }

    min_replicas = 0
  }
}
And your container-web.tf file should look like this:
resource "azurerm_container_app" "web" {
  name                         = format("ca-web-%s", local.resource_suffix_kebabcase)
  container_app_environment_id = azurerm_container_app_environment.this.id
  resource_group_name          = azurerm_resource_group.this.name
  revision_mode                = "Single"

  secret {
    name  = "container-registry-password"
    value = azurerm_container_registry.this.admin_password
  }

  registry {
    server               = azurerm_container_registry.this.login_server
    username             = azurerm_container_registry.this.admin_username
    password_secret_name = "container-registry-password"
  }

  lifecycle {
    ignore_changes = [
      template.0.container[0].image
    ]
  }

  ingress {
    external_enabled = true
    target_port      = 8080
    traffic_weight {
      percentage      = 100
      latest_revision = true
    }
  }

  template {
    container {
      name   = format("ca-web")
      image  = "crdevwefrt01.azurecr.io/fruits-frontend:1.0.0"
      cpu    = 0.25
      memory = "0.5Gi"

      env {
        name  = "API"
        value = format("https://%s", azurerm_container_app.api.latest_revision_fqdn)
      }
    }

    min_replicas = 0
  }
}
Run Terraform
It’s now time to deploy the Container Apps and the Cosmos Db you defined in the previous tutorial. Just run Terraform plan command and apply it:
terraform plan --out=plan.out
Then:
terraform apply plan.out
Test the application
To test the application, go to the Azure portal, in your resource group, find the frontend container and in the Overview tab click on the Application url link.
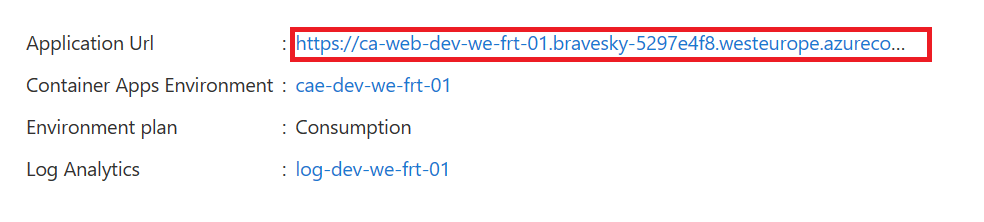
This will take a few seconds to appear because, remember you set the number of replicat for the container apps to 0.
If everithing is ok, you will see the application:

Rate the fruits and then go to your Cosmos Db database, and inside the Data Explorer tab you will see ratingdb. Navigate to it and you will see a collection of ratings.
Final touch
Congratulation! You have your Container Apps and your Azure Cosmos Db running. The application is now up and running. You will find the complete source code in this Github repository.
What’s next?
In the next tutorial of this series we will focus on adding Grafana to monitor your environment.