- Azure
- Azure DevOps
- UWP
When you want to industrialize the build and deployment of your UWP application you will need to install the PFX certificate to an agent. I m going to show you how.
Create a PFX file
Since Visual Studio 2019, there is no more Self-signed certificates generated with your project. So first of all you need to create a PFX file to sign your application. I recommand you to follow the official documentation to do that. When your certificate is created, export it into a folder of your choice.
When it’s done, upload it to the secure files inside Pipelines > Library > Secure files, in this tutorial the certificate will be called UWP-Pipeline.pfx.
Create the variables group
To install your PFX file we need to have the name of the PFX file that we define previously inside the secure files and the associated password. To access it securely we need to create a variables group and store at least the password. If you are not familiar with variables group you can look at my previous tutorial about it.
Let’s add these two parameters into a variables group like so:
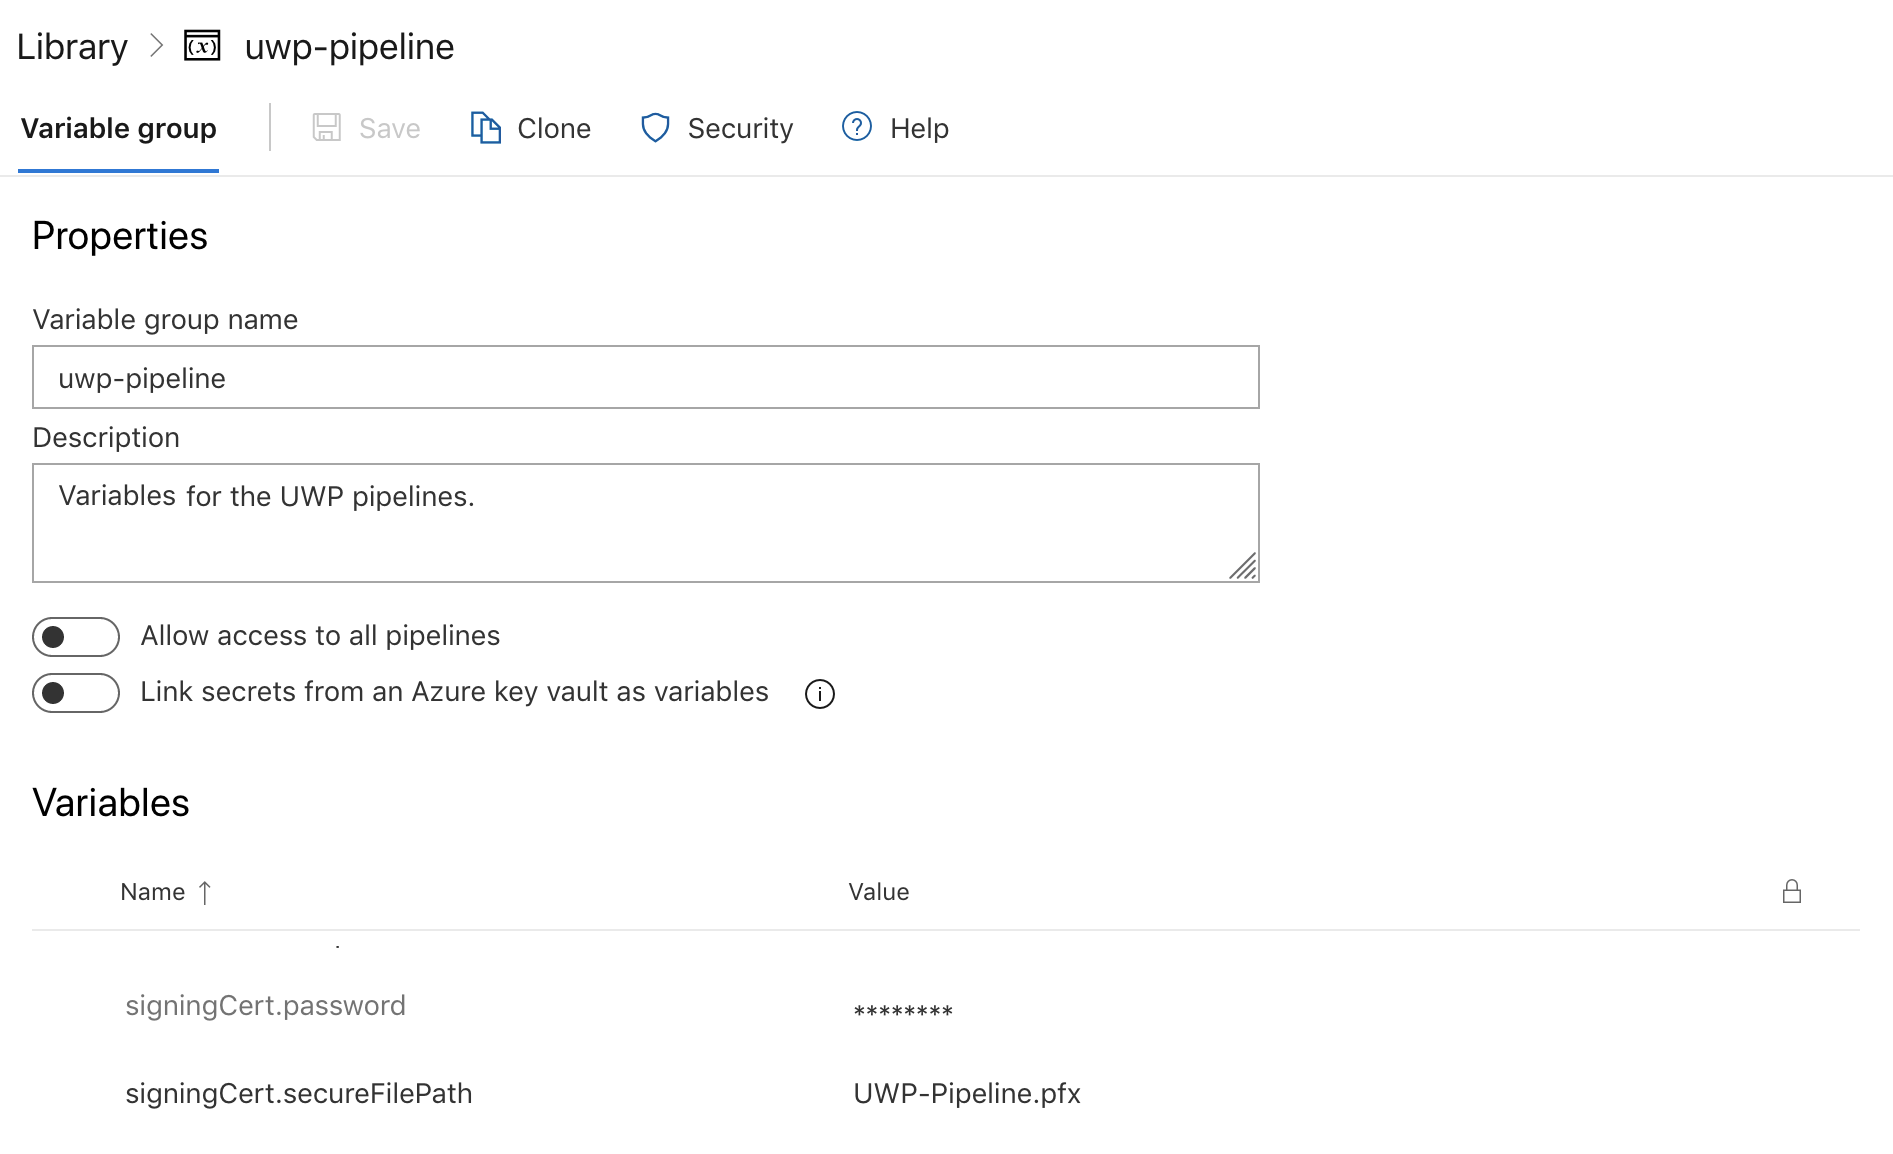
Notice that the variables group will be called uwp-pipeline.
Install the certificate
It’s time to install our certificate to the agent to be able to sign our UWP application.
First of all you need to download the PFX file from your secure file:
pool:
  vmImage: 'windows-latest'

variables:
  - group: uwp-pipeline

steps:
- task: DownloadSecureFile@1
  name: mySecureFile
  displayName: 'Get the pfx file certificat'
  inputs:
    secureFile: '$(signingCert.secureFilePath)'
The variable name mySecureFile will be use to find the path to the certificate downloaded. Next step, we need to use a PowerShell script to install the certificate in the store of certificates of our agent:
- task: PowerShell@2
  inputs:
    targetType: 'inline'
    script: |
      Write-Host "Start adding the PFX file to the certificate store."

      $pfxpath = '$(mySecureFile.secureFilePath)'
      $password = '$(signingCert.password)'

      Add-Type -AssemblyName System.Security
      $cert = New-Object System.Security.Cryptography.X509Certificates.X509Certificate2
      $cert.Import($pfxpath, $password, [System.Security.Cryptography.X509Certificates.X509KeyStorageFlags]"PersistKeySet")
      $store = new-object system.security.cryptography.X509Certificates.X509Store -argumentlist "MY", CurrentUser
      $store.Open([System.Security.Cryptography.X509Certificates.OpenFlags]"ReadWrite")
      $store.Add($cert)
      $store.Close()
We first define two variables $pfxpath for the path of the PFX file just downloaded and $password the associated password. Then we open the store of our current user and install the certificate.
Now your certificate is installed to your agent and ready to use!
Sources:
Happy codding !