- Azure
- Azure DevOps
- Xamarin
Once you automate your development process, you may have multiple pipelines. If so, each one has its own purpose and unique name.
This tutorial can be applied to any technology that can be used inside Azure DevOps, but for the needs of this tutorial here is one example of what it can be done with a Xamarin.Forms application using Azure DevOps:
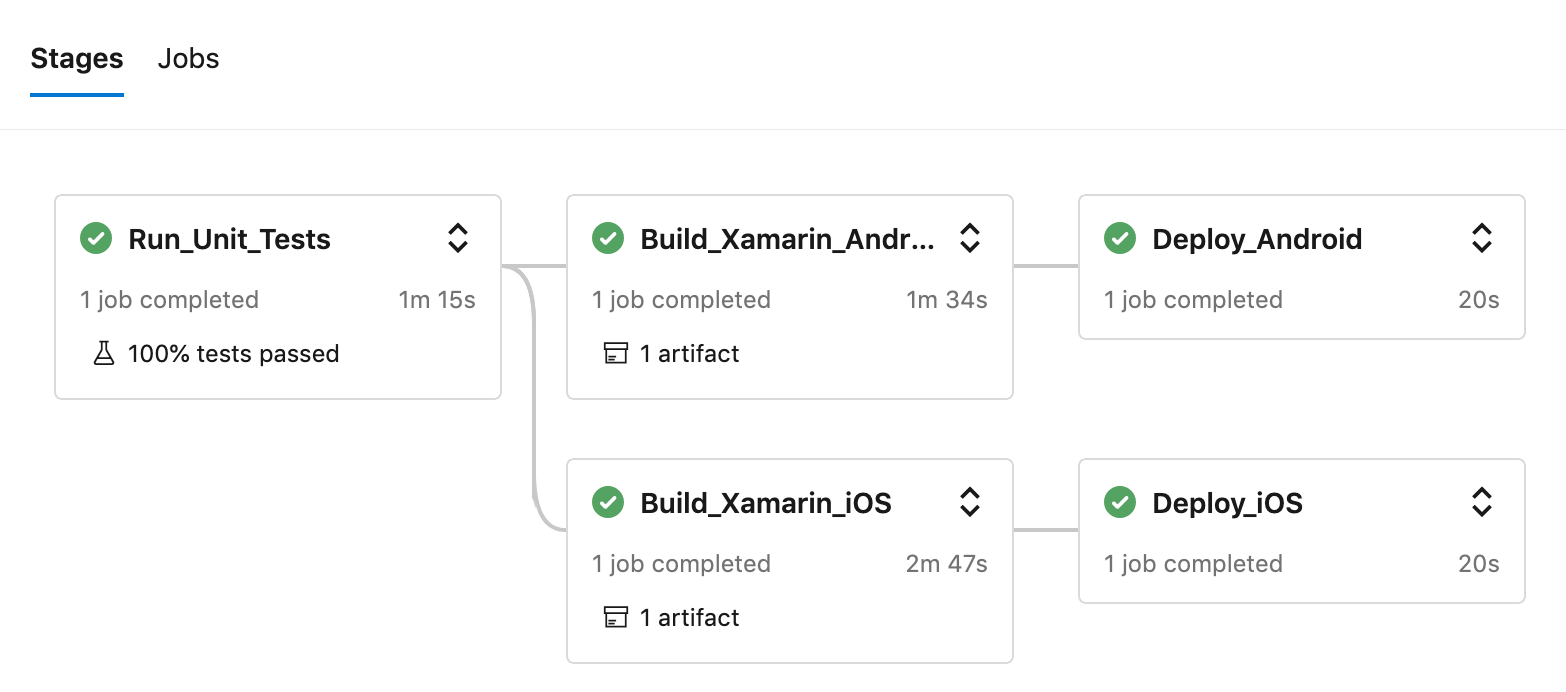
We run unit tests, then if they succeed, we build the iOS and Android projects. Finally, we distribute the application through App Center.
Now, what happens if for any reason you just want to build the Android application or distribute the iOS application?
Here is a non-exhaustive list of ideas:
- Create a specific pipeline for each case you want to handle (This will probably be a lot of ‘copy-paste’, not really maintanable)
- Start your pipeline as is and don’t care about redistributing everything (Not really professional)
- Use runtime parameters to give you the opportunity of choosing what you want to do while running your pipeline
You probably found the right answer, in this tutorial we are going to focus on the last possibility as well!
Prepare your parameters
Azure DevOps allows you to create your own options to run your pipelines, they will be automatically displayed into the run menu.
For the purpose of this tutorial, here are the options we want to have:
- Choose a project configuration.
- Specify a name on top of the launch icon for our application.
- Build iOS and/or Android.
- Distribute iOS and/or Android.
- Choose the build agent to use for iOS and Android.
Now with that in mind let’s start with this basic pipeline, based on the same structure as the Xamarin.Forms one I previously showed to you:
trigger:
  - none

pool: # Default agent if none is specified
  vmImage: ubuntu-latest

resources:
  repositories:
  - repository: templates
    type: github
    name: damienaicheh/AzureDevOpsTemplates
    ref: refs/tags/v1.0.0
    endpoint: GitHubTemplates

variables:
  - group: xamarin-full-pipeline
  - template: variables.yml

stages:
  - stage: Run_Unit_Tests
    jobs:
      - job:
        displayName: 'Run Unit Tests'
        steps:
          # Your unit tests steps goes here

  - stage: Build_Xamarin_Android
    dependsOn: Run_Unit_Tests
    jobs:
      - job:
        displayName: 'Build Xamarin.Android'
        workspace:
          clean: all
        steps:
          # Your build Xamarin.Android steps goes here

  - stage: Build_Xamarin_iOS
    dependsOn: Run_Unit_Tests
    jobs:
      - job:
        displayName: 'Build Xamarin.iOS'
        workspace:
          clean: all
        steps:
          # Your build Xamarin.iOS steps goes here

  - stage: Distribute_Android
    dependsOn: Build_Xamarin_Android
    jobs:
      - job:
        displayName: 'Distribute Xamarin.Android'
        steps:
          # Your distribute steps goes here

  - stage: Distribute_iOS
    dependsOn: Build_Xamarin_iOS
    jobs:
      - job:
        displayName: 'Distribute Xamarin.iOS'
        steps:
          # Your distribute steps goes here
To save build time during your configuration, you can add a basic task like Bash to simulate the steps done for each stage:
 - task: Bash@3
   displayName: 'My steps'
   inputs:
     targetType: 'inline'
     script: echo steps done
On top of this yaml pipeline let’s add parameters and define each property one by one.
Configuration
Below we have a list of configurations options depend on your projects settings. For instance, 4 possibilities: development, demo, staging, production.
parameters:
  - name: configuration
    displayName: Configuration
    type: string
    default: development
    values:
    - development
    - demo
    - staging
    - production

## All the following options goes below.
This will automatically create a dropdown menu for you because we have more than 3 options, instead you will have a list of radio buttons.
Add a banner name
You can add the ability to specify a name on the banner of the launch icon of your application if you need it:
- name: bannerName
  displayName: Display name of the banner (Launch Icon Badge)
  type: string
  default: ''
A basic input field will be displayed to let you write the name of the version, for instance: alpha, beta… To do that I created an Azure DevOps extension called Launch Icon Badge.
For more information about this extension, feel free to look at my previous tutorial to know more about it.
Choose the platform to build and distribute
To select which platform you want to build and distribute, you just need to define a few boolean like this:
For iOS:
- name: iOSBuild
  displayName: Build iOS
  type: boolean
  default: true

- name: iOSDistribute
  displayName: Distribute iOS (Only if build is checked)
  type: boolean
  default: false
and for Android:
- name: androidBuild
  displayName: Build Android
  type: boolean
  default: true

- name: androidDistribute
  displayName: Distribute Android (Only if build is checked)
  type: boolean
  default: false
With that done, you can select just the specific platform you need to proceed.
Select the specific agents
In some cases, you may want that some types of builds should be executed only on specific agents: for instance, iOS signing step needs to have a mac to accomplish it. So, to avoid your developer teams to overload the mac agents for Android builds you can force them to use a specific list of agents like ubuntu. This is especially true when you use Azure DevOps On Premise with your own agents.
- name: iOSImage
  displayName: Mac pool image
  type: string
  default: macOS-latest
  values:
  - macOS-latest
  - macOS-10.14
# Need macos to run the select-xamarin-sdk.sh for building .aab online.
- name: androidImage
  displayName: Android pool image
  type: string
  default: ubuntu-latest
  values:
  - ubuntu-latest
  - ubuntu-16.04
  - macOS-latest
  - macOS-10.14
With all these options setup if you try to run your pipeline you should see something like this:
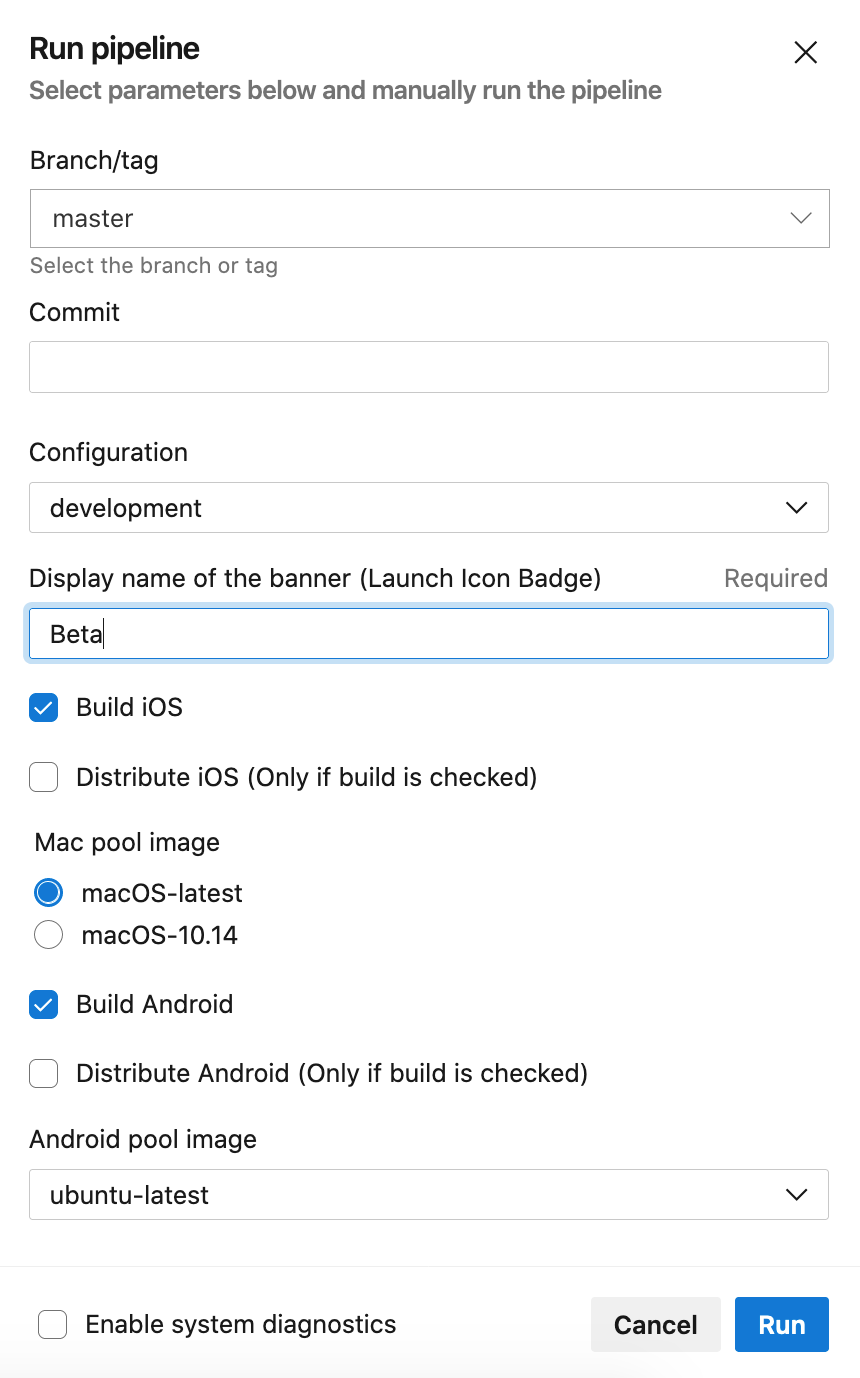
But if you hit the Run button, you will observe that your parameters haven’t been taken, why? because we haven’t linked them yet to the rest of the pipeline!
Link your runtime parameters
For the purpose of this tutorial I will not link the configuration and bannerName parameters in the following, but you will see how easy it is in the associated Github repository of this tutorial.
Build and distribute conditions
Based on our pipeline, we can now add condition to our stages like this:
For Android:
- stage: Build_Xamarin_Android
  condition: ${{ parameters.androidBuild }}
  dependsOn: Run_Unit_Tests
  jobs:
    - job:
      pool:
        vmImage: ${{ parameters.androidImage }}
- stage: Distribute_Android
  condition: ${{ parameters.androidDistribute }}
  dependsOn: Build_Xamarin_Android
Notice that, in this case because the Distribute_Android stage depends on the Build_Xamarin_Android one even if you uncheck the build checkbox and check the distribute one, the distribute stage will not start because it depends on the Build_Xamarin_Android stage. So you don’t need to worry about adding some extra and / or expressions to your condition.
We also specify the agent that we need, to build our application with the vmImage parameter.
Same process for iOS:
- stage: Build_Xamarin_iOS
  condition: ${{ parameters.iOSBuild }}
  dependsOn: Run_Unit_Tests
  jobs:
    - job:
      pool:
        vmImage: ${{ parameters.iOSImage }}
- stage: Distribute_iOS
  condition: ${{ parameters.iosDistribute }}
  dependsOn: Build_Xamarin_iOS
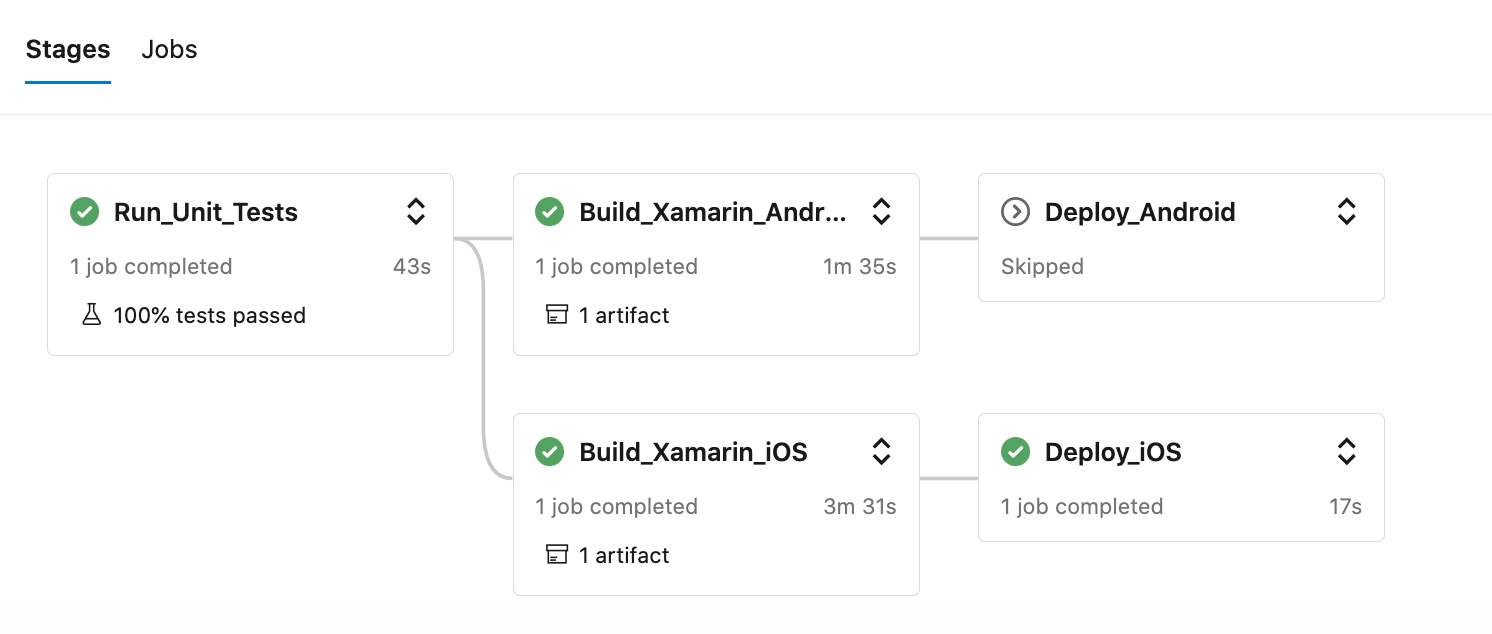
Now if you run your pipeline with these options you will have the ability to choose your options and see that your builds are skipped or launched depending on your choice, here is an overview of different cases:
Build Android and iOS but distribute only iOS:
Build and distribute iOS only:
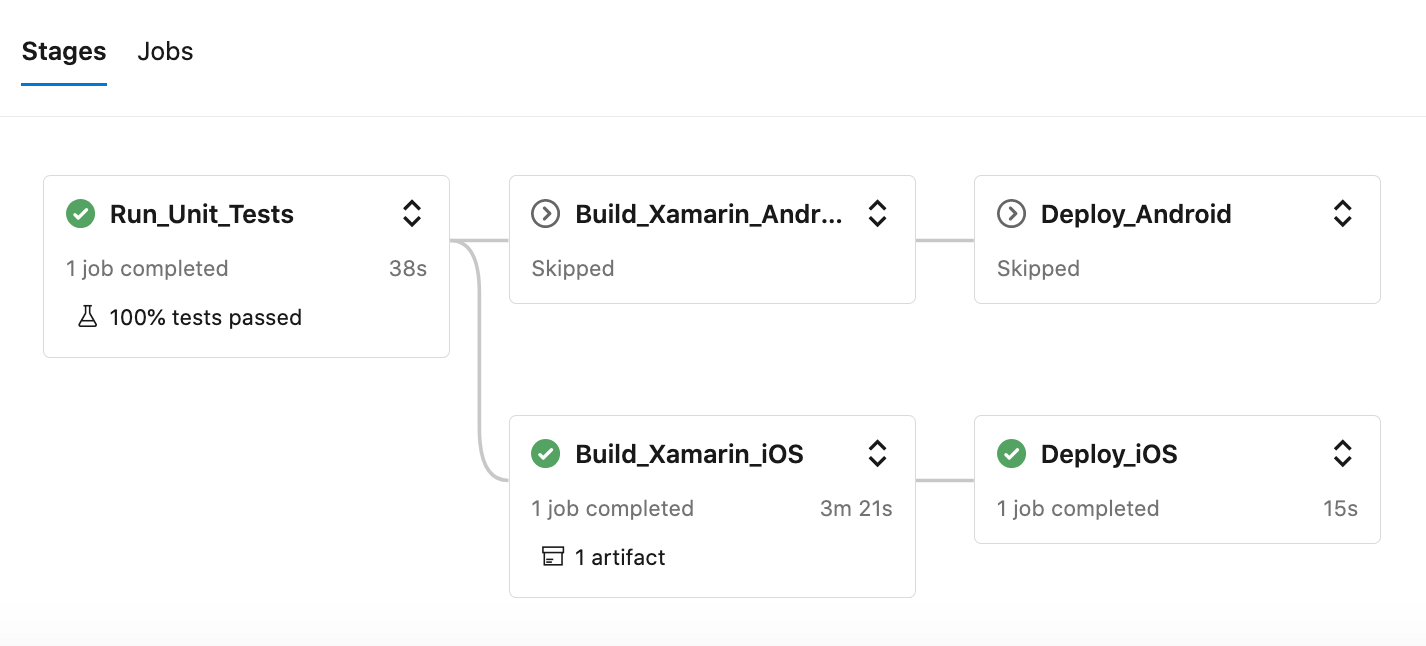
Build only Android:

Final touch
This feature gives you more control over the pipelines you create and you can also avoid duplicating or refactoring your pipeline to fit according to the need. You will find a more realistic example based on my previous tutorial series inside this Github repository. Feel free to adapt this example to your projects needs. This is a really useful feature so it would be a shame to not use it!
Sources:
Happy coding!
You liked this tutorial? Leave a star in the associated Github repository!