- Azure
- Azure DevOps
When you work with your team on a project, it is more likely that you would use a chat tool to communicate with your teammates. In this tutorial, we will shed light on Rocket Chat, which is an Open Source community tool.
In your projects, you would probably have multiple pipelines for development, stagging, production and so on to test and distribute your application. In some cases, you would be notified when some particular steps were done, this where hooking with Rocket Chat plays its role.
In this tutorial, we will discover how to set up Rocket Chat with your Azure DevOps pipelines to send notifications to a user or a specific channel.
Setup Rocket Chat
First things we need to do is to set up the hook inside Rocket Chat.
Assuming for the purpose of this tutorial you already have:
- Set up Rocket Chat for your team.
- Created a specific channel to receive the notifications.
- Created a specific Rocket Chat account to set up the hook.
If you use your own account, you will not receive the notifications because Rocket Chat will use your identity behind the scenes.
Once this account is ready, kindly go to Administration panel and inside Integration press the New button.
Fill all the mandatory properties like below and don’t forget to enable the hook:
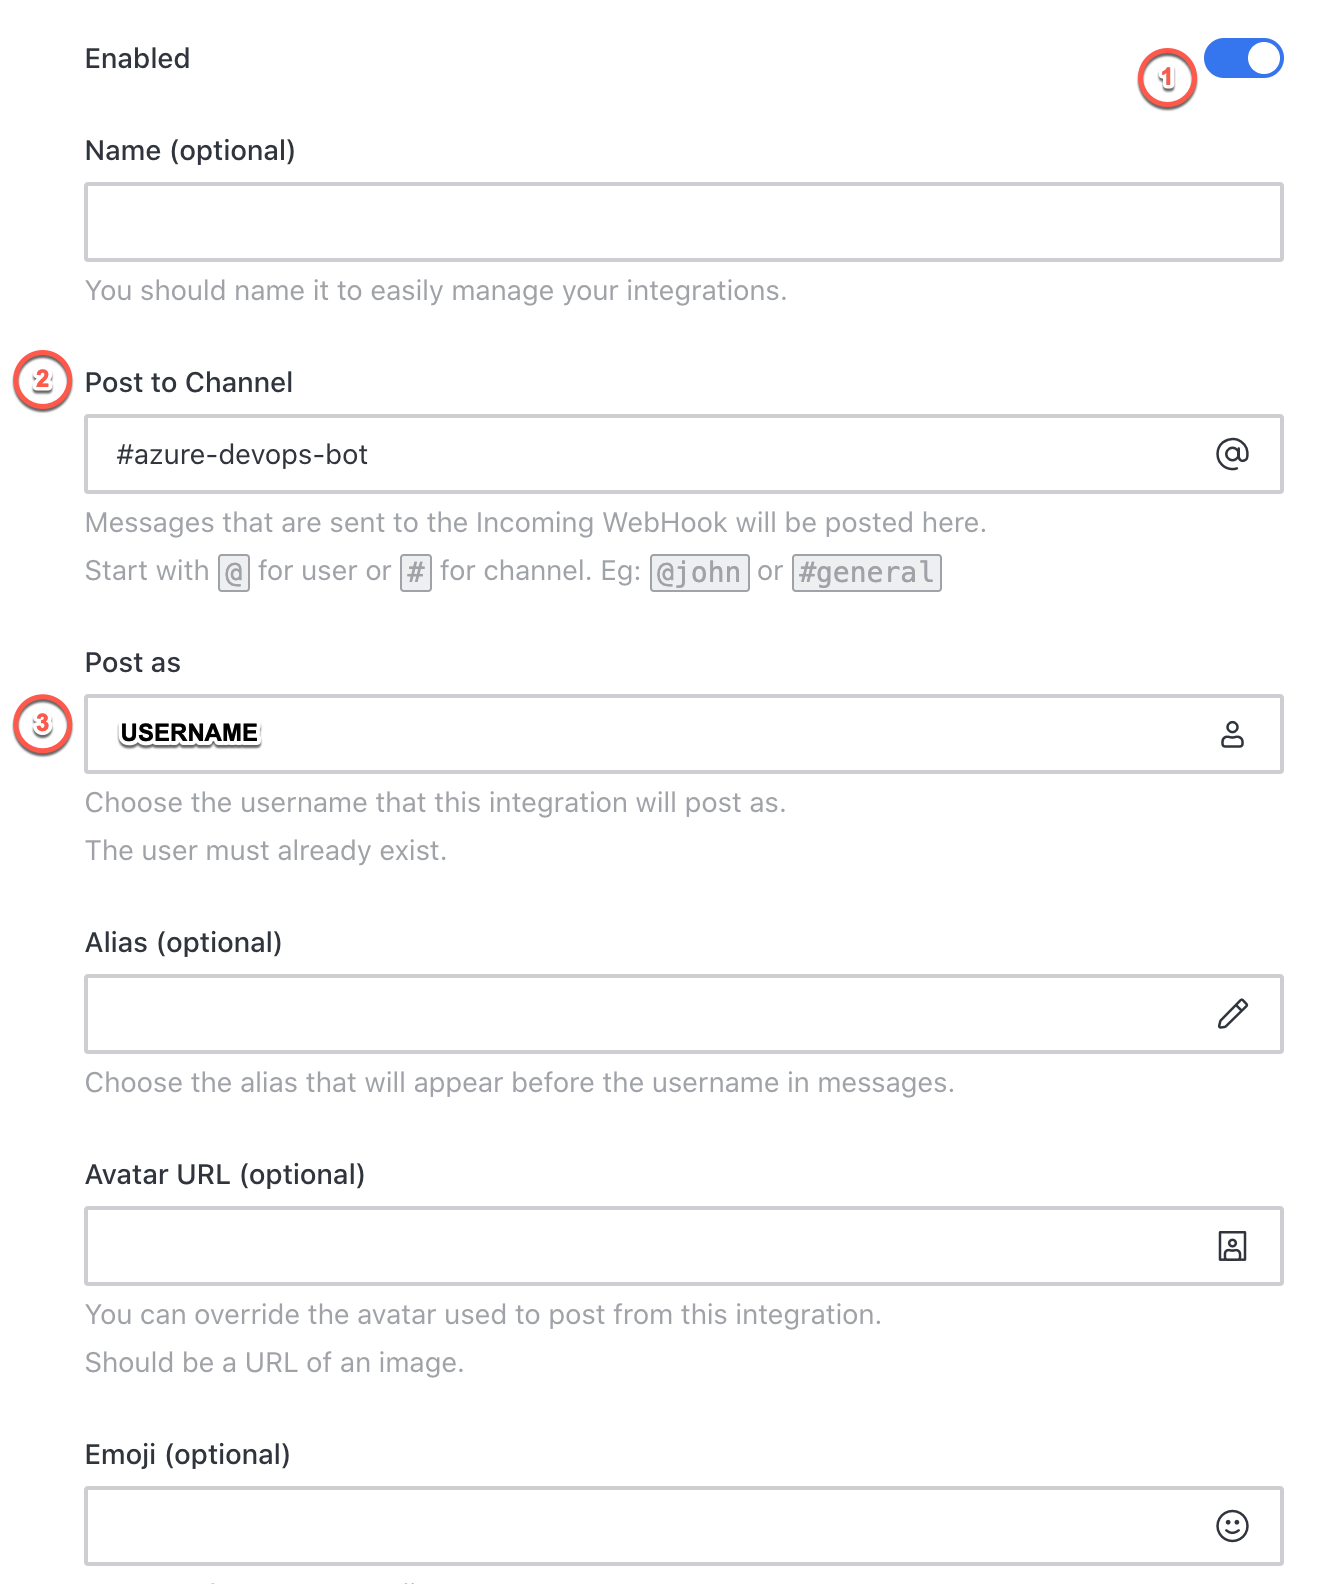
Kindly notice that you may have variety of options to customize the bot that will send the message (Alias, Avatar URL, Emoji…).
With that done, you can click the Save button at the bottom of the screen. Rocket Chat will generate for you the webhook url which should looks like : https://your_chat_url/hooks/your_token. You will need to use it in the next section of the task so copy and paste it in your favorite editor.
Now Rocket Chat is ready to receive notifications from Azure DevOps!
Send your first message
Setup the variable group
Let’s go to our Azure DevOps pipelines.
First thing we need to do is to create a variable group called secrets for instance, and add two keys:
rocketChatUrl: will have the first part of the url before the tokenrocketChatToken: will contain the token previously generated.
Do not forget to click on the lock button to keep secret at least the token value which is a sensitive data
If you haven’t used variable group before, checkout this previous article.
Add the Rocket Chat Notification task
First of all, go to your Azure DevOps and install the Rocket Chat Hook Notification extension into your organisation.
In your pipeline, you can now add this task like at the end of your deployment:
variables:
  - group: secrets

steps:
  ### ...all previous steps here

  - task: RocketChatHookNotification@1
    inputs:
      hookUrl: '$(rocketChatUrl)/$(rocketChatToken)'
      message: 'A new version of the application is available on production!'
      username: 'Deploy Bot' # Optional
      attachmentTitle: 'Available here:' # Optional
      attachmentTitleLink: 'https://www.url.com' # Optional
      attachmentText: 'This is for...' # Optional
      attachmentColor: '#00FF00' # Optional
      attachmentImageUrl: 'https://www.image_url.com' # Optional
As indicated above, many options are not mandatory, you just need to set the hookUrl with the variables we previously set, and definitely the message you want to send.
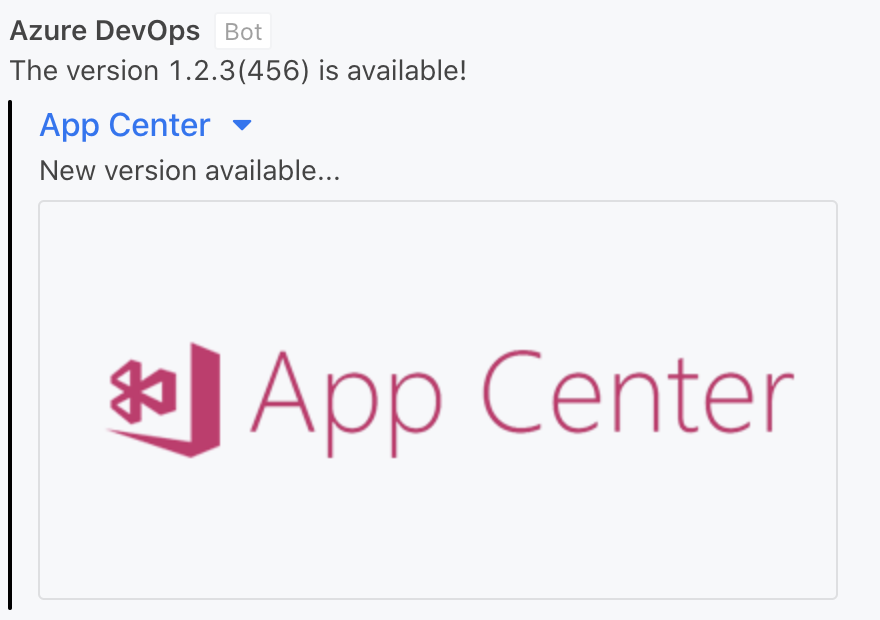
You will get this kind of result:
Final touch
You now have the ability to notify Rocket Chat users and channels from Azure DevOps. Now, It’s time to find the right use cases for your projects!
You will find all the task source code and samples in the Github project repository.
Happy coding!