- Azure
- Azure DevOps
- Xamarin
- Xamarin.iOS
- App Center
In this tutorial I m going to show you how to build and sign your Xamarin.iOS application and distribute it to your users through App Center.
To succeed, we need to follow these steps:
- Select the correct version of Mono to compile your Xamarin.iOS application
- Generate a provisioning profile and Apple Distribution Certificate
- Setup a variables group and upload your Apple certificates
- Build your application
- Configure Azure DevOps with App Center
- Deploy your application to App Center
First of all let’s go to Azure DevOps!
Inside the Pipelines tab create a New pipeline and follow the 4 steps to get the source code from the correct repository. Azure DevOps will automatically create a new azure-pipelines.yml at the root of your project folder. This file will define all the task we need and it will be interpreted by Azure DevOps.
Global configurations
We will compile our Xamarin.iOS application using the current latest version of mac available on Azure DevOps: 10.14. This will allows us to compile our iOS application for iOS 13.0. To configure that we need to select the correct mono version on our MacOs agent. For more detail about choosing your mono version please visit the full Microsoft documentation. For this tutorial we will use one of the latest one the version 6.4.0.
Let’s first specify this to our azure-pipelines.yml:
pool:
  vmImage: 'macOS-10.14'

steps:
- script: sudo $AGENT_HOMEDIRECTORY/scripts/select-xamarin-sdk.sh 6_4_0
  displayName: 'Select the Xamarin SDK version'
  enabled: true
Create your variables group
Like all jobs, we will need multiple variables like folder path, environnement variables and passwords. So to manage all of it let’s create a variables group. If you are not familiar with this you can look at my previous tutorial about it.
For this tutorial, the variable group will be called xamarin-ios-pipeline, load it by adding it on top of steps.
variables:
  - group: xamarin-ios-pipeline
Import your certificates
To sign your application you will need one provisioning profile and an access to an iOS distribution certificate.
Remember that if you use a certificate for the App Store you will not be able to install your application directly on a device. To do that you will need an Ad Hoc certificate especially if you want to deploy your application on App Center.
With your certificate and provisioning profile ready, you now need to upload them inside the Secure File. To do that go to Pipelines > Library > Secure files tab. For this tutorial my provisioning profile will be called My_Demo_Application_AdHoc_Distribution.mobileprovision.
With your Distribution certificate ready you need to export the public key of it. To do it, just add it to your Keychain on your mac and then, right clic on it and export it as a .p12 file, then you can upload it in the Secure File section. Don’t forget to add the associated password to the variable group.
Your variable groups should now looks like this:
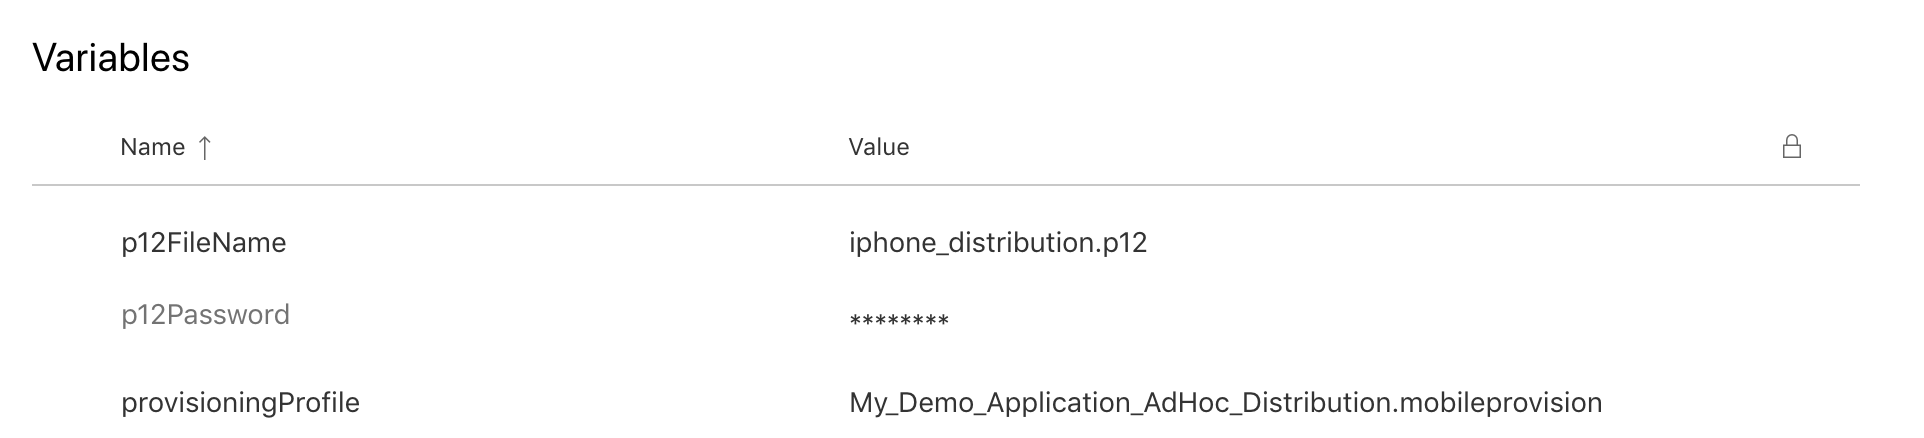
With that done, we can add two tasks to our azure-pipelines.yml:
First, install the apple certificate previously uploaded we will sign the ipa with it:
- task: InstallAppleCertificate@2
  inputs:
   certSecureFile: '$(p12FileName)'
   certPwd: '$(p12Password)'
   keychain: 'temp'
   deleteCert: true
Then add a new task to install the provisioning profile associated to your application like so:
- task: InstallAppleProvisioningProfile@1
  inputs:
   provisioningProfileLocation: 'secureFiles'
   provProfileSecureFile: '$(provisioningProfile)'
   removeProfile: true
Build and sign
With our certificates task ready, it’s time to build our application. Let’s start by restoring the Nuget packages of the solution:
- task: NuGetToolInstaller@1

- task: NuGetCommand@2
  inputs:
   restoreSolution: '$(solutionPath)'
Add the solutionPath variable below the variables group definition like this:
variables:
  - group: xamarin-ios-pipeline
  - name: solutionPath
    value: '**/*.sln'
Now we can add the build and sign task as below:
- task: XamariniOS@2
  inputs:
    solutionFile: '$(solutionPath)'
    configuration: '$(configuration)'
    packageApp: true
    buildForSimulator: false
    runNugetRestore: false
    signingIdentity: '$(APPLE_CERTIFICATE_SIGNING_IDENTITY)'
    signingProvisioningProfileID: '$(APPLE_PROV_PROFILE_UUID)'
Add the configuration value to the variables too:
  - name: configuration
    value: 'Release'
Let’s explain what we did with the XamariniOS@2 task. We choose a Release configuration and we enabled the generation of a package for the app: an ipa.
The $(APPLE_CERTIFICATE_SIGNING_IDENTITY) variable correspond to the Install Apple Certificate task we previously did and is automatically set.
The $(APPLE_PROV_PROFILE_UUID) variable is automaitically set by the the Install Apple Provisioning Profile task and is linked to the provisioning profile we previously did.
If nothing is specified for the signingIdentity and signingProvisioningProfileID options, the settings of your project will be used.
Now if you run your job for the first time, you will get an error message that ask you to give access to your variable groups and secure files. Accept it by clicking on Authorize resources, restart the build and you are good to go.
Deploy to App Center
Now we have our ipa signed and ready to be sent to our users. My favorite tool for that is App Center, you can share your application with different groups of testers before publish it to a store and that’s really useful.
Let’s continue by setting up the connection between App Center to Azure DevOps. To do this, just follow my tutorial about it and then follow the next steps.
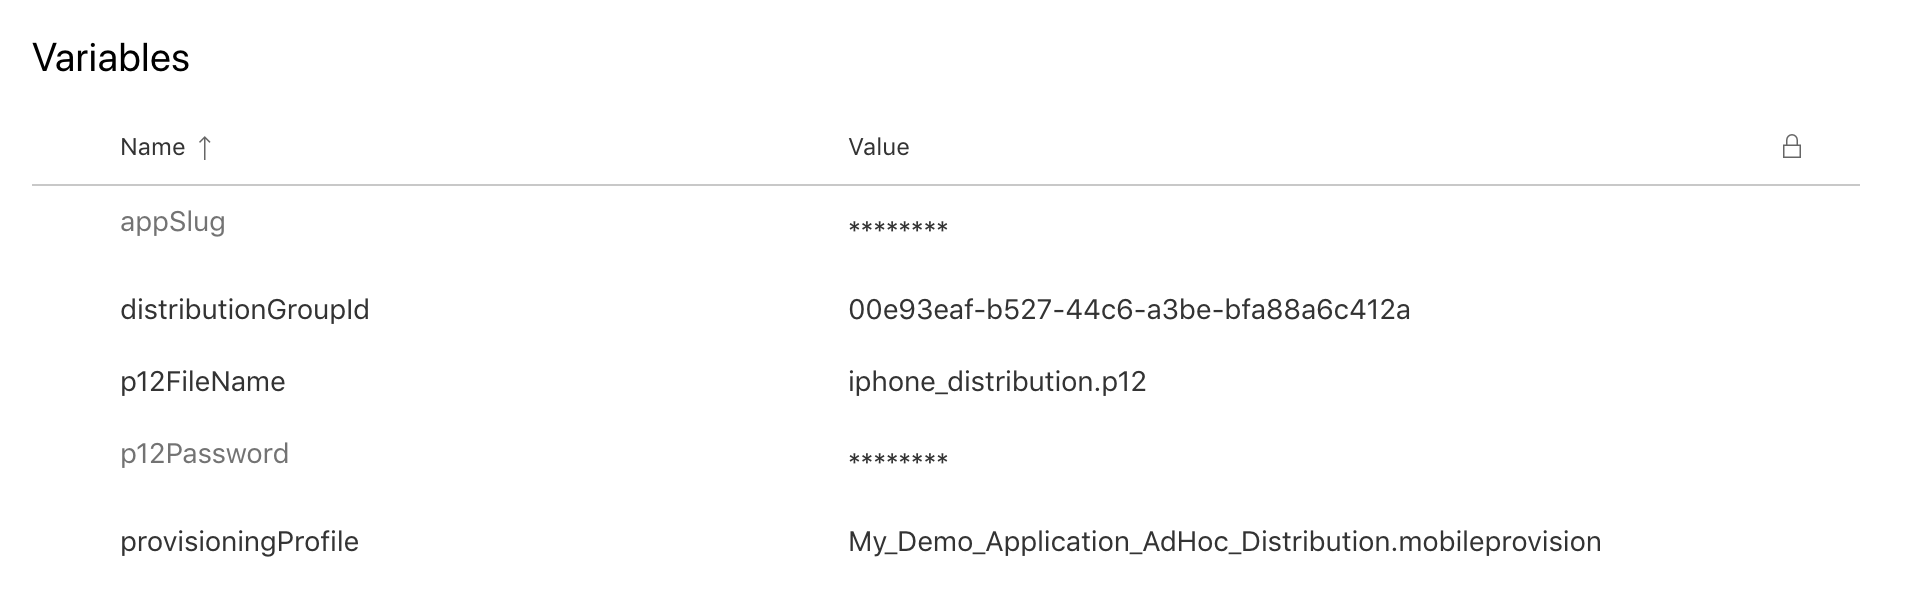
If you followed correctly the previous tutorial, you can now add your app slug and distribution group ID to the variables group. At this point your xamarin-ios-pipeline variables group should look like this:
Finally we can add the final task to deploy our ipa to App Center:
- task: AppCenterDistribute@3
  inputs:
    serverEndpoint: 'VSAC'
    appSlug: '$(appSlug)'
    appFile: '$(build.SourcesDirectory)/**/*.ipa'
    releaseNotesOption: 'input'
    releaseNotesInput: 'New ipa release ready.'
    destinationType: 'groups'
    distributionGroupId: '$(distributionGroupId)'
If you run your pipeline now, you will be able to see your ipa deployed into App Center for the correct group. You can now download it and install it to your device!
Here are two ways to do that:
-
Connect to App Center with your physical device and inside the Distribute section find the download links like below and directly install the
ipa. -
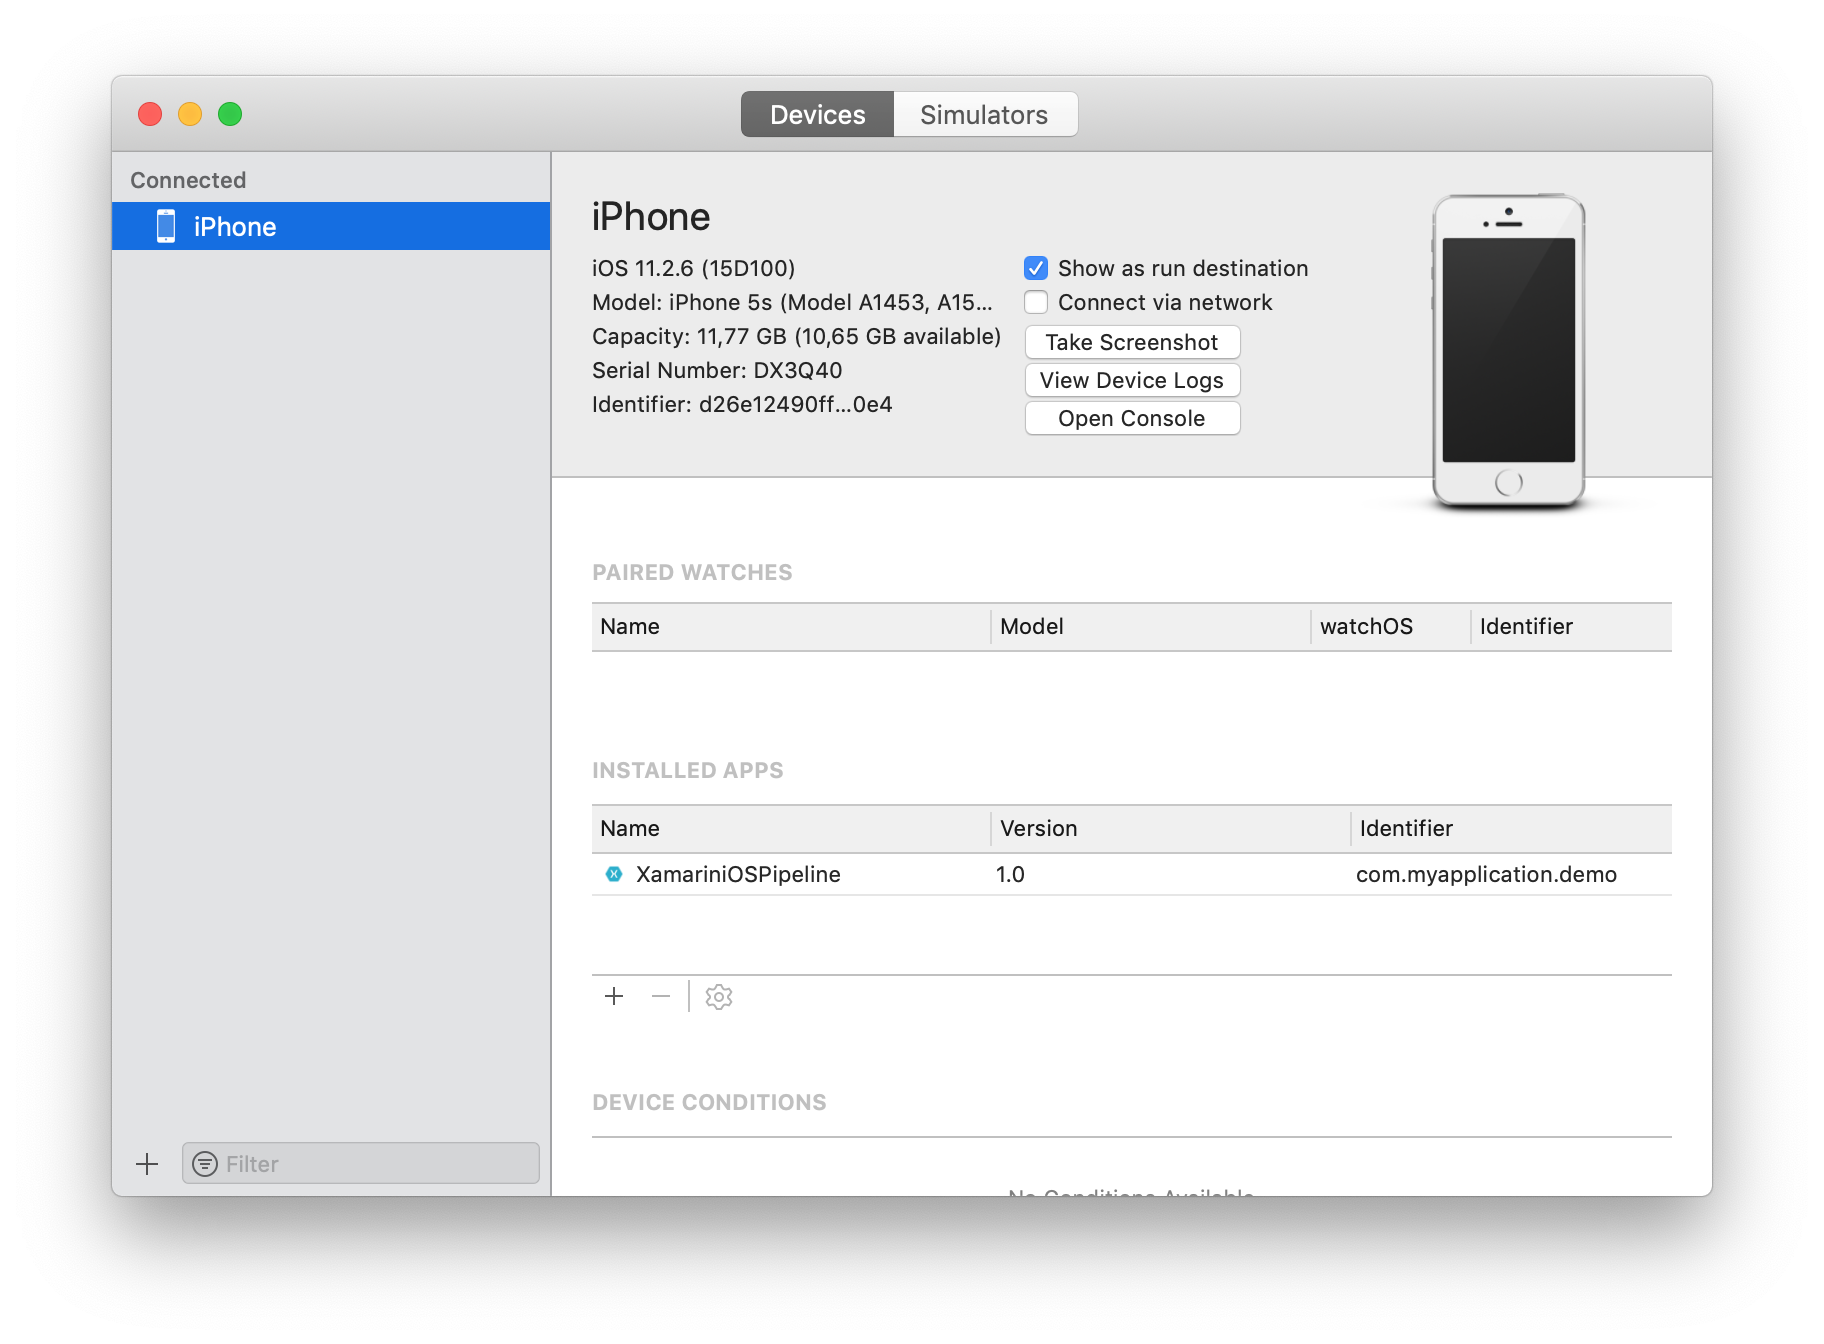
On a mac, open a browser and connect to App Center and inside the Distribute section download the
ipafile. Then connect your physical device to your mac and open XCode. Inside XCode go to Window > Devices and Simulators and then drag and drop theipafile into theInstalled Appssection and it will be automatically installed. In case of trouble when installing your package, click on theOpen Consolebutton on top of theInstalled Appssection and you will see all the logs for your device and why it’s not working. For example, you can get an error if your device does not target the minimum OS version you specified inside theinfo.plist.
Sources:
- NuGet Tool Installer task
- Nuget task
- Install Apple Certificate task
- Install Apple Provisioning Profile task
- Xamarin.iOS task
- App Center Distribute task
You will find full source code in this Github repository.
Happy coding!
You liked this tutorial? Leave a star in the associated Github repository!