- Azure
- Azure DevOps
- Xamarin
When your application is built and signed for the correct environment, it’s now the time to distribute it to the users. You have multiple ways to distribute your application. I am going to focus on two:
- Distribute into App Center for your testers.
- Publish the package as an artifact inside Azure DevOps so you can upload it to the store of your choice.
In the previous tutorial we saw how to manage your application environment using Azure DevOps. This tutorial is part of a full series of Azure DevOps tutorials using a Xamarin.Forms application as an example.
If you want to take the same azure-pipeline.yml to start with just clone the repos and move to the manage_environment branch. This tutorial can be read independently and the concepts can be applied to any mobile technology you use.
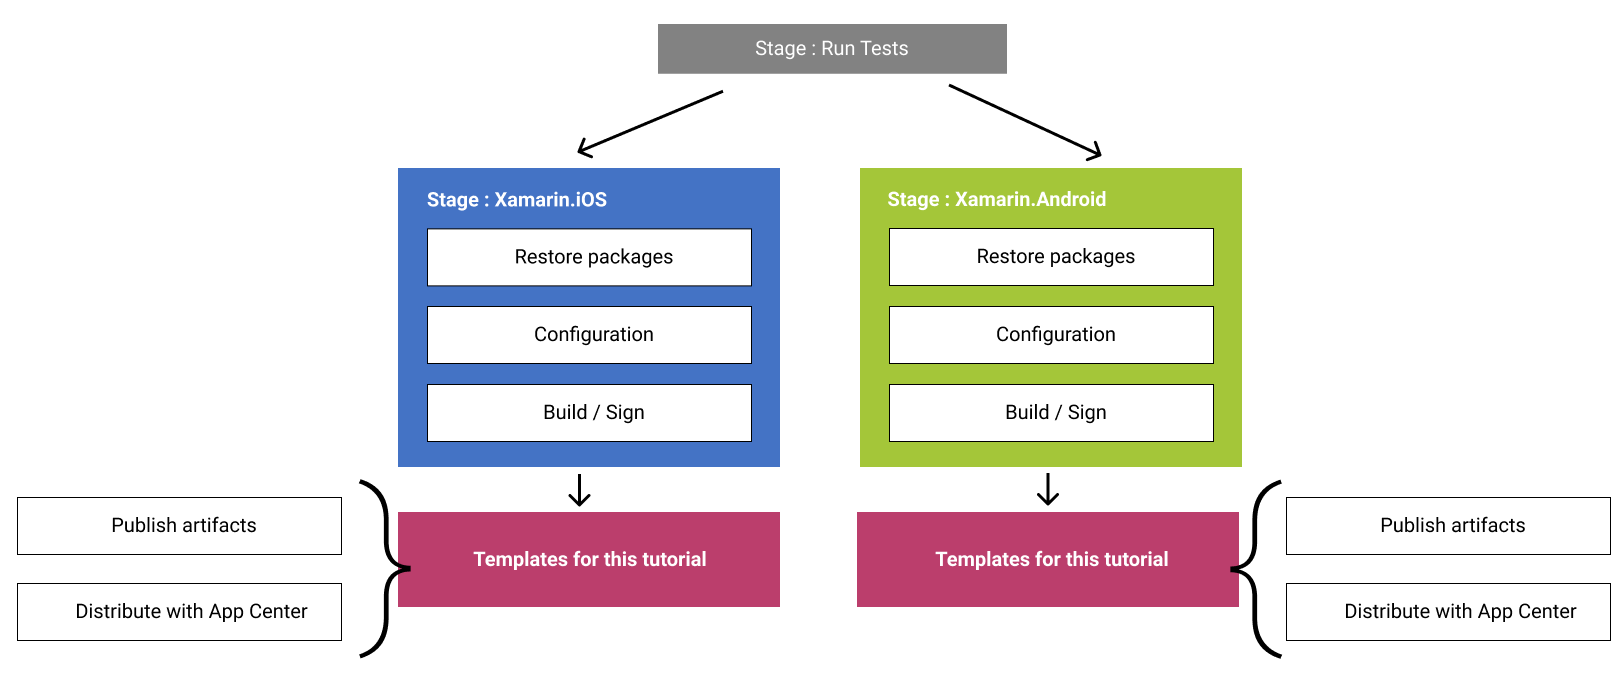
To help you better understand, here is an overall diagram of what has already been done in the previous tutorials and where the steps that we will see in this tutorial are done:

Publish artifacts
In order to have the ability of uploading a package to the store you need to publish the packages you just built. To do that, let’s create a new template called publish_artifacts.yml with this content:
parameters:
  sourceFolder: ''
  contents: ''
  artifactName: ''

steps:
  - task: CopyFiles@2
    displayName: 'Copy deliverables'
    inputs:
      SourceFolder: '${{ parameters.sourceFolder }}'
      Contents: '${{ parameters.contents }}'
      TargetFolder: 'drop/${{ parameters.artifactName }}'

  - task: PublishBuildArtifacts@1
    displayName: 'Publish release'
    inputs:
      pathToPublish: 'drop/${{ parameters.artifactName }}'
      artifactName: '${{ parameters.artifactName }}'
In this template we copy the files into a drop folder and publish it no more no less.
It’s really simple to use it, just pass the source folder where your packages were generated and the type of file you want to get.
Based on what we setup for the previous tutorial, by using msbuild directly to build and sign our application, the package generated will be suffixed by Signed for Android, so we can filter it with this information.
If you use apk it will be:
- template: templates/publish_artifacts.yml
  parameters:
    sourceFolder: '$(Build.SourcesDirectory)/XamarinDevOps.Android/bin/$(buildConfiguration)'
    contents: '*Signed.apk'
    artifactName: '$(buildConfiguration)_android'
If you use Android App Bundle, just change the apk extension with aab for the contents attribute and it will be done.
For iOS it will be done like this:
- template: templates/publish_artifacts.yml
  parameters:
    sourceFolder: '$(Build.SourcesDirectory)/XamarinDevOps.iOS/bin/iPhone/$(buildConfiguration)'
    contents: '*.ipa'
    artifactName: '$(buildConfiguration)_ios'
Because we run the build configuration using the Release status we will have two folders at the end named “release_android” and “release_ios”. This is not a convention, it just makes it easier to follow when you build multiple environment at the same time, feel free to name it as you like.
If everything goes well you will see your two packages like this:

With that done you can then upload it to the Store of your choice.
Distribute with App Center
Before distributing your application to all the users you would send it to a list of testers. This would help you find some bugs and get some feedbacks.
App Center is a really good tool for that. First of all, you should create one project for each platform and then you need to setup the connection between App Center to Azure DevOps. To do this, just check my previous tutorial about it and then follow the next steps.
For this tutorial my connection will be called VSAC for “Visual Studio App Center”.
For each project, you now have an app slug and a distribution group id for your testers. With that ready, let’s create a new template called deploy_to_app_center.yml inside our templates folder. Assuming you published your package as an artifacts before, we are using the DownloadBuildArtifacts@0 task to download it from previous build.
parameters:
  serverEndpoint: 'VSAC'
  appSlug: ''
  fileToPublish: ''
  distributionGroupId: ''
  releaseNotesInput: 'New Version'

steps:
  - task: DownloadBuildArtifacts@0
    displayName: 'Download artifacts'
    inputs:
      buildType: 'current'
      downloadType: 'specific'
      downloadPath: 'releases_drop'

  - task: AppCenterDistribute@3
    displayName: 'Deploy to Visual Studio App Center'
    inputs:
      serverEndpoint: '${{ parameters.serverEndpoint }}'
      appSlug: '${{ parameters.appSlug }}'
      appFile: 'releases_drop/${{ parameters.fileToPublish }}'
      releaseNotesOption: 'input'
      releaseNotesInput: '${{ parameters.releaseNotesInput }}'
      destinationType: 'groups'
      distributionGroupId: '${{ parameters.distributionGroupId }}'
Usage
With your appSlug and distributionGroupId ready you can now add the template below to send the right package to App Center. Do not forget to add your variables or load your variables group.
Based on the previous tutorial we will add a stage to deploy the application for each plaform.
Each stage will depend on the build of his platform, this is how the dependsOn is setup.
For Android the stage will look like this:
- stage: Deploy_Android
  dependsOn: Build_Xamarin_Android
  jobs:
    - job:
      displayName: 'Deploy Xamarin.Android'
      steps:
        - template: templates/deploy_to_app_center.yml
          parameters:
            appSlug: '$(androidAppSlug)'
            fileToPublish: '$(buildConfiguration)_android/*.apk'
            distributionGroupId: '$(androidDistributionGroupId)'
For the moment, App Center does not support sending an Android App Bundle so you need to convert it to an apk using the bundletool. You will find more info at the end of my previous tutorial.
For iOS it will be:
- stage: Deploy_iOS
  dependsOn: Build_Xamarin_iOS
  jobs:
    - job:
      displayName: 'Deploy Xamarin.iOS'
      steps:
        - template: templates/deploy_to_app_center.yml
          parameters:
            appSlug: '$(iOSAppSlug)'
            fileToPublish: '$(buildConfiguration)_ios/*.ipa'
            distributionGroupId: '$(iOSDistributionGroupId)'
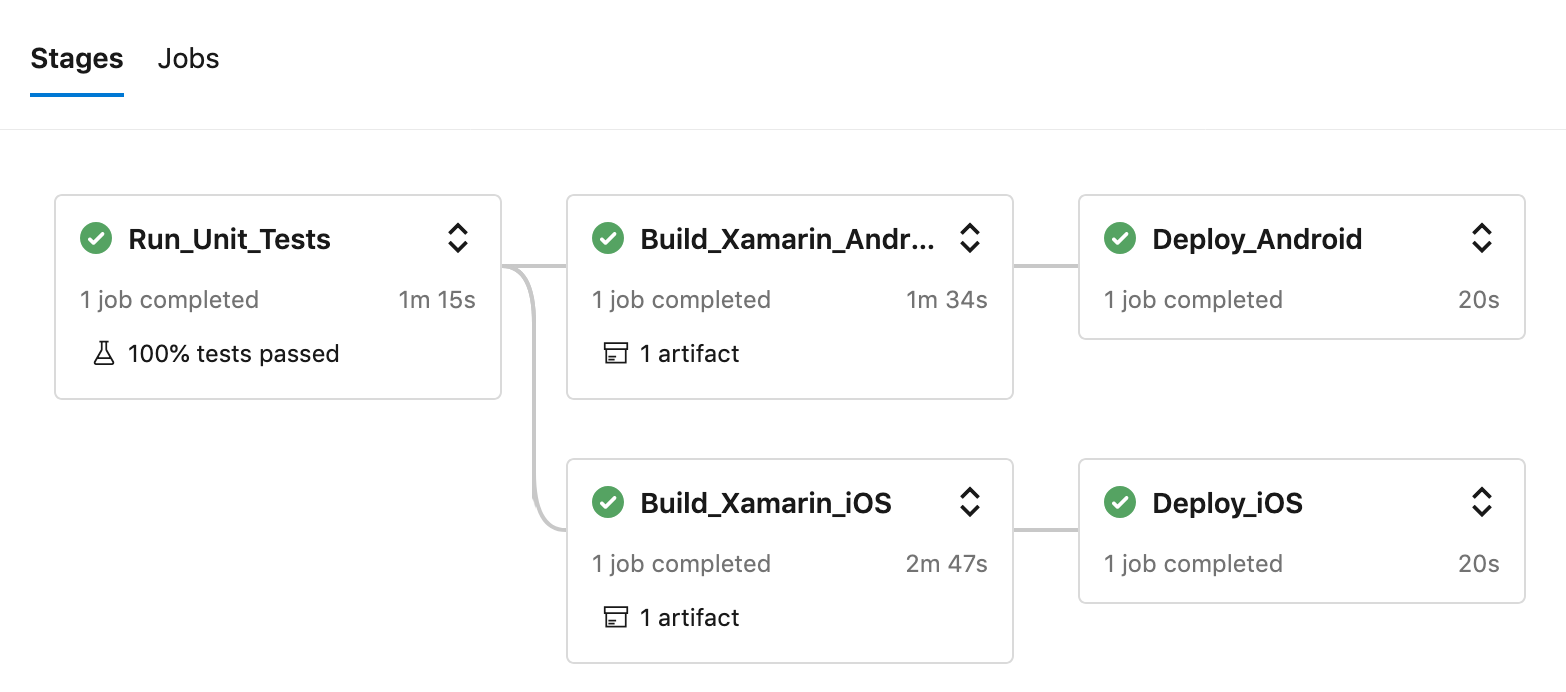
If you do it correctly and run your pipeline you will see something like this:

You can see two artifacts published once you click on it, and they are downloadable.
If you want to know more on how to monitor your application using App Center or NLog I recommend you to take a look at my previous tutorial about it.
Final touch
Your application is now ready to be tested from the users and you can upload it to the store of your choice. You will find full source code in this Github repository in the prepare_distribution branch. This will show you a completed example based on the previous tutorials of the series.
What’s next?
In the next tutorial of this series we will focus on creating our own yaml repositories for Azure DevOps.
Happy coding!
You liked this tutorial? Leave a star in the associated Github repository!